Railway modelling in 7mm scale on 9mm gauge track, representing 15" gauge miniature railways and 18" gauge industrial railways. (Plus anything else that I choose to include!)
Pages
Friday, 27 October 2023
This is Planet Hex
Tuesday, 24 October 2023
To Caistor and Cleethorpes
I thought some railway content on the blog was in order after a few weeks of Doctor Who. On Sunday, with clear skies after the stormy weather of the previous days, I headed across Lincolnshire to Caistor for the annual model railway exhibition. Despite many flooded fields I found that the roads were largely clear, the only bit of surface water encountered being a big pool on the A46 (although I discovered on my return home that the outgoing route I had taken via Bawtry was now closed due to flooding).
Town hall shows can bring a mixed variety of layouts, the highlight for me being Paul Windle's 'High Stamley', an atmospheric 009 layout placing the railway in the landscape in a relatively small space. It also runs very well to a pattern that the operators know and provides movement most of the time, including on the road. There's also a very large dog from a popular animation hiding in a corner!
 |
| (Click for larger version) |
Saturday, 21 October 2023
The Colour of the TARDIS
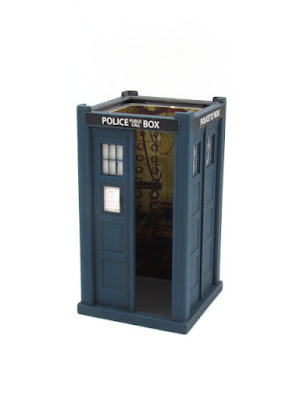
The Peco roof has (quite correctly for a Metropolitan Police Phone Box) three "tiers" to the structure. The 2005 TV prop has only two, in fact the majority of the TV props only have two... I couldn't ignore this and resorted to reconstructing the roof by slicing off the top tier and opening out the resultant giant hole in the second tier to inset the top tier into. It was rather messy (and still is on the inside) but Milliput soon smoothed it out. After a re-prime of the roof I applied a black-grey wash over the whole structure as a base for painting.
Painting proper could now commence, at the beginning of the project I had searched for an appropriate blue paint, eventually choosing Citadel 'Stegadon Scale Green' as the best potential match. Despite the name, it is blue, and actually closely resembles BR Rail Blue! I applied three coats, the first straight from the tub but applied in a dry-brushing motion to leave a little of the accumulated dark grey in the recesses. The second coat was lightened with a drop of grey and again applied in a dry-brushing style to not 100% cover the first. The last coat was lighter still and less heavily applied. This process built up a nice 'patina' on the panelling. I then painted the floor grey, washed over with black-grey, and the boxes for the lettering in matt black.
Sunday, 15 October 2023
Painting the Doctor
By contrast the first Doctor was a little easier to paint the details on (you cannot see his shoelaces...) His hair actually caused the biggest issue as it should be all grey but that looks wrong and texture-less, so he has to have some darker bits. As he is not the chosen figure for the mini-diorama this is no real concern but is certainly something to think about for future figures. Both figures were completed a few weeks ago with a coat of Humbrol matt varnish from an aerosol, but in the best traditions of time travel are only now being revealed!
Saturday, 7 October 2023
Trial of a Timelord
On my return I still wasn't convinced and started work using an alternative figure and the same coat extension method, but without that hands-in-pockets look. However one evening I took another look at the original figure and set-to with scalpel, files, 5 thou styrene lapels and Milliput to create a layout of the upper coat that actually looked about right. I had always planned to transplant in a different head so that was also completed at this stage.
Now what is an anniversary special without it being a multi-Doctor adventure? The more I looked at the second figure he looked like an old man in a long coat, so with a few tweaks it became a shorter coat and a bit of work around the collar gave me a neck-tie and a reasonable (if you squint) William Hartnell.
Photographing figures in the process of modification is tricky, but the view above shows how I had used Milliput to create the bottom of the jacket on the tenth Doctor figure and to manipulate my styrene lapels towards the neckline. Milliput forms a lot of the texture of the coat extensions, as can be seen on the rear view, and I also added texture and shape to the hair on both figures. If there is one take-away from this whole process it is how much this texture transforms these cheap figures, as the hair is usually their worst aspect, often featuring a injection mark and no detail.
Happy with the figures I tentatively added a coat of grey primer to see how everything blended together, and found the result quite satisfactory. At this stage I had not decided which would figure in the diorama, I was certainly keeping my options open. The closer resemblance of the Peco Police Box to the 2005 prop was eventually the deciding factor to go with the tenth Doctor.
From the back the hair texture becomes more apparent with a coat of paint. The seam on the back of the tenth Doctor's coat was a last minute addition before painting as I had spotted it on a GIF I had posted to a Teams chat at work. Research never ends!
Sunday, 1 October 2023
Doctorin' The TARDIS
In my last post I explained the basis behind my planned Doctor Who mini-diorama and how I planned to use the Peco 7mm scale Police Box kit to represent the TARDIS. Wishing to create something as close to a TV prop as I could from the kit I first had to identify which era I wanted to represent. My heart wanted to go for the late 1980s, a 'Remembrance of the Daleks' scene would be nice but I had doubts I could conjure up suitable figures. In the end I settled for the 2005 TARDIS as I had a better chance of success with the figures.
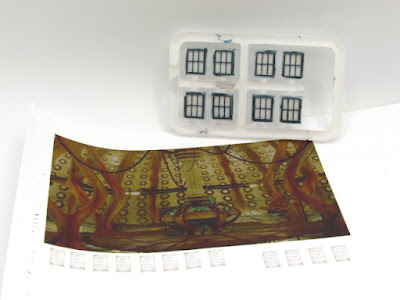
Looking at the kit parts the first big difference was in the size and recessed depth of the 'Police Public Call Box' panel, the kit has this narrow and deeply recessed, whereas the TV prop has a wider, almost flush panel. I therefore filled the kit panels with 20 thou styrene infills to bring them almost flush. The other major surgery at this stage was to carefully cut out the right-hand door to allow it to be modelled open, adding 10 thou styrene strips around the edges of the removed piece to bring it back up to size.


