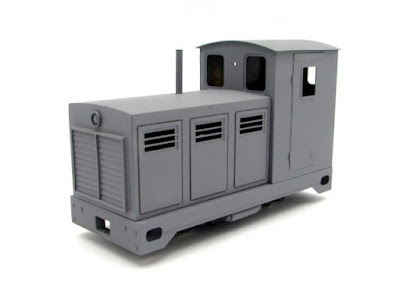
When we last saw the A1 Models 'Albert' build I had assembled all of the provided parts and I subsequently started to consider what changes I wanted to make to the basic kit.
The first addition was a curved bonnet top, using a piece of 20 thou styrene sheet recycled from an old ice cream carton lid (!) Cut to just oversize and sellotaped to the outside of a small saucepan (whilst no-one was looking), then dunked in a pyrex dish of just-boiled water for a few minutes and subsequently cooled. This way used less water than the more obvious route of the inside of the pan and filling it! A 30 x 60 thou strip of Evergreen styrene down the centre and two 20 x 40 strips at appropriate intervals hold the shape, the whole assembly being held in place with Araldite and subsequently trimmed to size.
On the underframe 40 thou styrene was used to make bufferbeams to fill the gap in the etched part. Openings for MicroTrains couplers were marked and cut out prior to fitting. An 80 x 156 thou strip of Evergreen styrene along the top on the inside both increased the gluing area and will provide substance to fix the MicroTrains couplers to in due course.
After looking at a few more photos of 'Albert' at Littlehampton I decided that I could not live with the front grille arrangement. Whilst searching for some other detail parts for the project I chanced upon an Avalon Line resin grille casting. This was about 0.5mm narrower than the etched grille and 0.5mm taller. With the etched overlay removed (it was only ever tacked in place) and the mesh cut away, I was able to clean up and carefully open up the aperture to take the casting. I backed the casting with strips of 20 thou styrene and Araldited it in place from behind.
Prior to fitting the grille in place I marked up, centre-punched and drilled a hole in the bonnet front to accept a turned headlight, with a similar hole on the cab back. The cab front was drilled centrally for a horn or whistle.
The next job was to fill all the gaps with Milliput, concentrating on the bonnet front and top of the sides, the bufferbeams and cab corner join and roof edges (to smooth out the corrugations). Once set this was smoothed back and I made a trial fit of the headlights (A1 Models 4mm scale mainline diesel turnings). In the process of fitting the front one I realised the resin radiator wasn't straight or central, so out that came to be refitted and refilled. I then added an exhaust from brass tube and some bolt detail to the bufferbeams from styrene rod. I had intended to replicate the prototype's buffers but opted not to in the end.
Further work on the chassis has included adding a rudimentary bench seat at the back of the cab and a coupler pocket arrangement in each bufferbeam to secure MicroTrains 1015 couplers. This involved removing the section of bufferbeam under the opening and replacing with 40 x 100 thou styrene, as the screw hole is centred only 1mm from the bufferbeam face.
At either side of the underframe I had previously Araldited some chunks of styrene, onto which I have added air tanks from the usual sources of Dapol Railbus and Drewery shunter kits. Additional strips of styrene help centre the Kato chassis, although this will need to be secured with double-sided tape after painting.
Progress has reached the stage where it is agonisingly close to being ready to paint, but the weather is not favourable to getting out to the workshop to do so - and the prospect of having to turn the heater on! A further delay here may be caused by the tramcar and its accoutrements currently taking up the paintshop 'bay' and paint stands...
Colin


