Many moons ago I would find that I had enough annual leave left after Christmas to have a week off in February, and I would sometimes get the idea that some great railway project might come out of it. I'll be honest, it rarely did, so in recent years I've steered clear of calling it a 'railway week'.
This year might have been slightly more productive. It started with the trip up the road to Doncaster for the 'Festival of British Railway Modelling', a slightly overwhelming event but one where this year I managed to purchase several items for future and ongoing projects - and managed to forget I would need a part for a new project that is now satisfactorily well on the way into being. To find out what it is, read on...
I've even managed a couple of trips to 15" gauge railways. Tuesday saw me head to the coast to see the latest developments on the Cleethorpes Coast Light Railway. Here the new owners are making more visible progress, Lakeside station now has a much longer through platform and the terminal bays are being inset into the platform surface to give a multi-purpose area. The 'Smallest Pub on the Planet' is having a makeover and there are improvements in the workshop too.
Friday afternoon saw a contrived trip home from the shops via the Sherwood Forest Railway, where 'Pet' has a fresh coat of paint and a new roomy, comfortable tender, the driver's head is now below cab roof height and the effect looking through the cab is very effective (the same can of course be said for no.24 above!).
After a false start on Sunday (you may have read the last post about
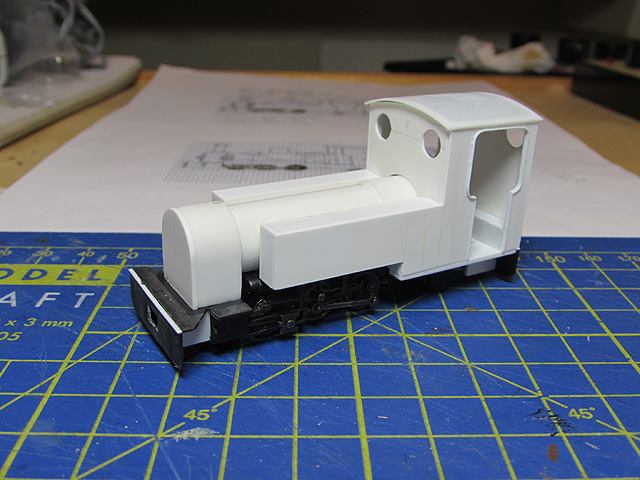
oil drum therapy), my new project occupied a couple of afternoons and one morning during the week. Having been challenged to create something over the next few months I have dusted off an old scheme to build a model of an Exmoor Steam Railway 0-6-2T on a Bachmann chassis. This is a concept that I have had under consideration for some time but which for various reasons hasn't happened. Chiefly there was the promise of a resin kit from Avalon Line to fit their own 0-6-0 chassis, but with the chassis no longer available and the kit moving from development stasis to standstill, I decided that the time was right.

I have reached the point structurally where there is nothing much else to add - everything beyond this point will be fettling and detailing. This is a good point to have reached as I have undertaken all the work so far in my time off this week, it's back to reality next week so time will be much more limited and suited to adding smaller parts. Speaking of which, the part I didn't buy at Doncaster was a smokebox door handle, hopefully I can pick something up at the forthcoming Lincoln show.
More details of the build can be found on the
Miniature Railway World forum, where a concerted effort is being made to revitalise the forum after a quiet period.
Colin