Showing posts with label The Path to.... Show all posts

Sunday, 2 October 2016

The Path To... (Reworked)

The last time we saw 'The Path To...' was back in January, when it went into the display case with an experimental backscene depicting beach huts in the distance, and a promise that the crossing would gain some warning signs.


The backscene never really found favour in the display case but I felt that the scene looked a little out of context without it, despite a little blown sand in the scenery it was not obvious it was a seaside scene! Having decided that it was due an upgrade of the grass textures following the success of the here was an opportunity to do something about it. I also decided to add a fence along the back edge, and to finally install the crossing warning signs. The result is shown below.


As well as the enhanced grass textures I have added a lot more blown sand into the scene, using the same fine sand that was used for the dunes on 'Shifting Sands' followed by Mig Beach Sand weathering powder.

The fence is a length of Parkside Dundas station fencing reduced in height and painted and weathered to look like a weather-beaten seaside fence.


The new sign posts are 1/16th" brass tube sprayed with grey primer, the signs are some I printed some time ago onto photo paper, which was sprayed grey on the reverse and with matt varnish on the fronts to kill the shine. The signs are superglued to the posts, with dummy strapping on the reverse from silver car trim line. The advertising sign is a left-over from 'Shifting Sands' given similar treatment, this is secured to the post using 5 amp fuse wire to give the impression it is an unofficial addition!

With these additions I feel that the seaside atmosphere is created and this micro-diorama is now truly complete.

Colin

Monday, 18 January 2016

The Path To... (Part 2)

When we last looked at this micro-diorama the basic scenery had been completed using ground foam and hanging basket liner. The next stage was to add some texture and colour variation to the grassed areas using some Silfor 'tufts' and Gaugemaster/Noch laser cut plants.


With the glue dry I carefully dry-brushed the tufts with a light grey/green mix of acrylic paint to reduce the sheen, and applied matt varnish to the laser cut plants to tone them down a little.


I also set about many areas of the scene with weathering powders, applying greys to the ballast and pathway areas, some earth tones around the edges of the grass beside the ballast and path, and finally some blown sand around the path edges and steps.


As you may have already guessed, the idea is to show that this is the path to the beach and hint at a seaside location. Perhaps the path to... Shifting Sands?


I do plan to add some signs warning of the crossing, but until then it has gone into the display cabinet. My usual light-wood surround and lettering completes the scene - or does it? As an experiment I have added a small backscene in the display cabinet to add to the illusion of depth. The beach hut scene is my own photo taken at Chapel St Leonards, given a watercolour filter in 'Photoshop' and printed on canvas photo paper.


Whether it is an experiment to be repeated, we shall see, I'm always looking at how items can be displayed and there are pros and cons to the micro-diorama approach, not least that it shows up that the cabinet shelves are not totally flat!

Colin

Monday, 4 January 2016

The Path To... (Part 1)

'Son of Up-cycle'

Started as an experiment made from MDF offcuts mitre-fixed end-on this is intended as one of my slimline dioramas that fit in my wall-mounted display case. As it uses track from the original 'Up-cycle' and more recycled material it really is the next step in the Up-cycle saga! In original form it was too narrow and I had put it to one side awaiting inspiration. Doodling saw me first add a building along the rear to add depth, followed by the thought of adding a strip of timber and building up the ground level in a bank, inspired by the cafe area and steps on 'Shifting Sands'.


A balsa strip was added along the rear to add 5mm to the depth, and as a basis of the banking and steps. Being carveable balsa is idea for this task as a hard edge to the top of the bank has been avoided. Steps are built up from foamcore and mount board. Button polish has been used on exposed timber and card surfaces to toughen it up and help avoid warping.


Slow progress was then made, partly to check that the MDF base wasn't warping under the stresses of scenic applications. The banked area has been filled with kitchen roll and covered with strips of newspaper held in place with diluted PVA.  Ballasting has taken place, Woodland Scenics materials secured with 'Kleer'.


Basic textures were added to the concrete steps, tarmac path and ground areas. Both made use of Green Scene textured paints, concrete for the steps, general muck for the tarmac. The latter had some plaster added to lighten it a little. The ground used my mix of paint/PVA and plaster left over from 'The Headshunt'. Think plywood planking makes up the crossing timbers.


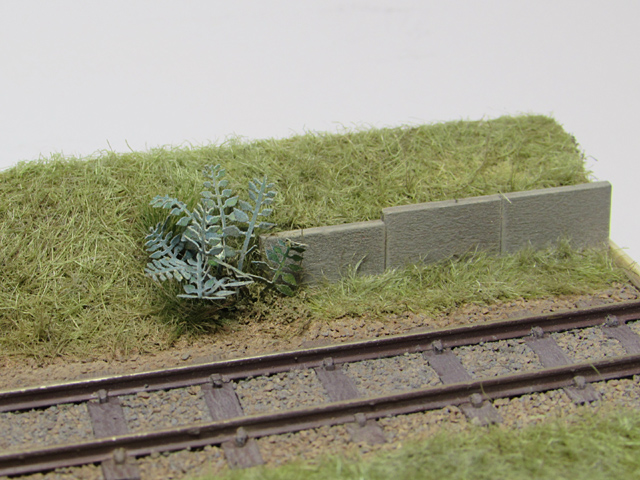
Both the steps and path had some adjustments to both texture and colour, with a little weathering added. More colour variation will be built up in due course using weathering powders. At the far end some of my pre-made paving slabs form a short section of retaining wall. The ground areas have been covered with what is described as 'Shifting Sands earth mix' - Woodland Scenics fine earth and fine sand for the coastal sandy look.


Once the turf was dry and excess vacuumed off, PVA was applied again and hanging basket liner applied. Even the hanging basket liner was recycled, the other side of the pieces used on 'The Headshunt'! Once left for 3-4 hours this was carefully teased away to leave plentiful grass coverage. This was trimmed back with a disposable razor and nail scissors to give the effect below.


In part 2 I'll show the extras added to the grassland and the final weathering of the trackwork and pathway.

Colin