Tuesday 31 December 2019

Now look what you've started!

... which is exactly what I said when the 'Beck Bridge' met the baseboard for the project that it's now abandoned extension plan kick-started...


I've filled in the joins in the corner of the backscene to allow a smooth transition between side and end boards. You might also notice a touch of Morecambe and Wise along the front edge where you now "can't see the join" after application of Milliput and some smoothing...

On that seasonal favourite I'll wish all readers of O9 Modeller a Happy New Year.

Colin

Saturday 21 December 2019

Plan B - for bodgery!

 (or how not to build a baseboard...)

With plans to expand 'Beck Bridge' from diorama to micro layout now abandoned, work on progressing "Plan B" has started, despite my intention to leave it until the new year. The 23 1/2" x 7 1/2" board first envisaged as a test track has been expanded into a board that is 30" in total length with provision for a water feature in the front left hand corner.


On the front edge I cut the pine strip back at an angle over the end of one of the battens underneath in order to get the most support for the join. The new backscene is 3mm ply on the back and 5.6mm at the end, both from the extravagance of new sheets of material! A piece of recycled ply forms the base layer of the trackbed extension at the left hand end. This piece was in undercoat already and conveniently the required depth. It has since been topped with a piece of foamcore board that was also spookily correct in one dimension...


The less said about what goes on underneath the better, but it's pretty solid. Just visible on the right hand side are the trim pieces added around the top and sides of the main backscene board. All new exposed timber has now had a coat of gloss oil-based varnish as the first stage in protecting it from the thrills and spills ahead.

There will be a fiddle yard run off added after Christmas, using the ply that was cut for the extension of 'Beck Bridge'. Very little goes to waste!

Colin

Saturday 7 December 2019

There's always Plan B...

There is a piece of training we deliver at work where at one point we explain how the system warns you if you are about to take a "destructive action". Layout planning doesn't always do this for you but having spent a good few days doodling, brooding and examining, it became clear that extending 'Beck Bridge' might be a destructive action too far and that I would have to up the game for plan B. Whatever that was...

Plan B is envisaged to be based on the corkboard-esque board that was in service as the "new" test track, albeit then on the mk2 version. Whilst this worked satisfactorily, I was torn between leaving it in bare boards form, some low-level scenic work or something more layout-like with backscene boards etc added. 


It also became apparent during my recent coupler clinic that as a test track it took up too much desk space to be able to work on the item being tested. So I have replaced it with a smaller version, constructed from oddments during my initial workshop investigations into the 'Beck Bridge' rebuild.


An off-cut of ply 18.75" x 4.25" forms the top surface with framing from window beading strip that once graced a real 15" gauge carriage. A coat of varnish makes it all look a lot better than it really is and Peco track and MicroTrains uncouplers were recovered from the bigger version to create a two short sidings holding two wagons each, which is enough for testing purposes.

Which of course frees up the original board to potentially rebuild as plan B! There is an option to break out of the desk-sitter mould and extend the board by another 8" to the left if required and a potential extension could include a dropped area for a water feature, but probably not another bridge!* Track layout possibilities include recreating the mk1 version of the test track;


or adopting the basic idea from the 'Beck Bridge' extension; or even a new take on this plan that I drew up 15 years ago before going down the 'Shifting Sands' path....

Colin

*and yes, I have thought of recycling the bridge off the diorama...


Saturday 30 November 2019

Hidden in Plain Sight

In my last posting about a potential plan to extend 'Beck Bridge' into a thin micro layout, I was torn between hiding a sector plate off-scene to close off the loop or making it a scenic feature. In the recesses of my mind another idea from Neil Rushby came back to me, from an article in the August 2008 Railway Modeller called 'A Scenic Sector Plate', about trying to hide a sector plate in plain sight.

The Ministry of Daft Ideas now seems to have developed a 3D visualisation department complete with a suite of items for planning purposes to see if this could be applied to the Beck Bridge rebuild.


This looks quite effectively hidden but not as cramped as when I mocked-up a hole-in-the-sky hidden version. Whilst the sector plate is aligned to the back road (which would be the "normal" position) the water tower hides the fact that the front line is disconnected. The structure alongside this is nominally styled after a phone box but could equally be a portaloo or even the TARDIS...

From the wider angle the result is also reasonable.


This is all working towards the formulation of my plans, there may be a totally separate 'Plan B' to also consider but that is currently an un-developed theory!

Colin

Sunday 24 November 2019

Onwards from Beck Bridge

Since building the 'Beck Bridge' diorama it has spent most of it's time sat in a cardboard box either in the workshop or railway cupboard. The only times it has seen the light of day was for the 009 Society exhibition in Mansfield and for a daylight photo-shoot, producing shots such as this.

I've spent some time lately pondering what to do with it in the longer term as it doesn't really suit as a photographic set in the same way the 'The Headshunt' does. Now the Ministry of Daft Ideas came up with a few crazy ones including incorporating it into a continuous run. A sketch exists but I'll spare you that!

However, a post about "picture frame" scenes on the NGRM Online forum sparked an interesting thought, could 'Beck Bridge' be incorporated into a narrow, picture-frame style layout? Using a print out of the overall view I sketched a few additions, then scanned this in and composited the original picture back in...


The idea is to add to the right-hand end, doubling the length from 14 to 28 inches. This would be a fairly destructive act but I think achievable due to the way that the frame is constructed. Trackwork would have to be reworked to remove the KB scale dummy rail joiners that would stop smooth running and as part of this process I would actually lift some of the existing track and replace it with a point that feeds a short loop for a station.

I've sketched in a loco-length sector plate at the end of this hidden by the wing and most likely on a bolt-on board. A few commentators have suggested that this could be made fully scenic or be fully scenic and a turntable. I'm not fully sure about that element yet, I have a theory about making the scene seem longer by not visibly closing off the loop. I also like the idea of the loco vanishing for a few seconds and reappearing on the other line. Neil Rushby's 'Isle of Avalon Tramway' was in my mind, where a traverser was hidden in an overall roof and engine shed to great effect (seen here in new ownership). I didn't sketch in a roof but it is a possibility....


To the left-hand end a cassette fiddle yard would be added as a separate board.  Short trains such as my Exmoor tank and a couple of coaches could be operated effectively on this set-up. We shall see what develops as there are a couple of alternatives to consider as well...

Colin

Saturday 9 November 2019

Coupling Clinic

One of the advantages of the desk-sitter test track is that it allows for some tinkering and testing of couplers as well as locomotive mechanisms. A lot of the MicroTrains couplers on my wagon fleet have been added as a necessity but never actually used very much for real shunting. Getting them in a fit state to do so can involve a little fettling of drop-arms and plenty of 'Grease-Em' graphite lubricant. 


Of course this only works if the couplers themselves are in a good state. One of the bogies on the van in the picture had been equipped with a Kadee knuckle spring rather than the correct MicroTrains one. I vaguely recall doing this at a time I was short of springs and it worked to an extent but not to uncouple! Replaced with the correct item it was a problem soon resolved, although the idea is a good one of you have couplers in use that you don't want to uncouple accidentally.

So far about 10 of the Shifting Sands and extended fleets have been seen to, the result being much more reliable coupling and uncoupling. This all informs future layout planning....

Colin

Sunday 3 November 2019

Without a Loop

Unable to run to Humberston station this season the Cleethorpes Coast Light Railway has been operating a half-line service between Kingsway and Lakeside stations. At Lakeside a problem presents itself as the through platform (3) has no loop and the former terminus platforms (1 and 2) have lost theirs. A pattern of operating has been developed that avoids reversing empty stock or shunt-release.

On Monday 28th October, in bright, low, light I was able to record the sequence using the LNER O4 2-8-0 and the ex Bush Mill Railway 'DA1'. Here the O4 approaches Lakeside station entering the passing loop.


The train draws to a halt before the point that splits the line between platform3 (where DA1 is waiting) and platform 1 on the right.


The guard uncouples the locomotive from the train.


The O4 draws forward into platform 1 as the guard prepares to change the point to allow DA1 to move onto the train.


The guard signals to the driver of DA1 as it moves towards the train.


DA1 draws the train forward into platform 3 to terminate.


With the train in platform 3 the O4 backs out of platform 1 and moves forward onto the train.


The train is now ready to depart back to Kingsway. After departure DA1 will be moved back up the platform to repeat the sequence for the next arrival.


I do like to record these movements in the hope that at some point it will prove inspirational to a layout project, almost anything is possible!

Colin

Saturday 2 November 2019

Did I just see that on TV?

I know that the Great Model Railway Challenge TV series isn't everyone's cup of tea, but I have watched the second series with interest, and it is fair to say that amongst the odd themes has been some good modelling and more time dedicated to the participants explaining what they have done.

Catching up on the final I discovered an interesting project from Team Grantham called "Fun of the Fairground". The scale wasn't really mentioned but it certainly wasn't 1/76. I did spot the combination  described as a "miniature train" of an N gauge Peppercorn Pacific hauling modified Peco Lynton & Barnstable open wagons carrying overscale passengers.


It might not be O9 but it's probably as close as we'll come to seeing it on TV for a while...

Colin

Wednesday 23 October 2019

Cardboard Caravan

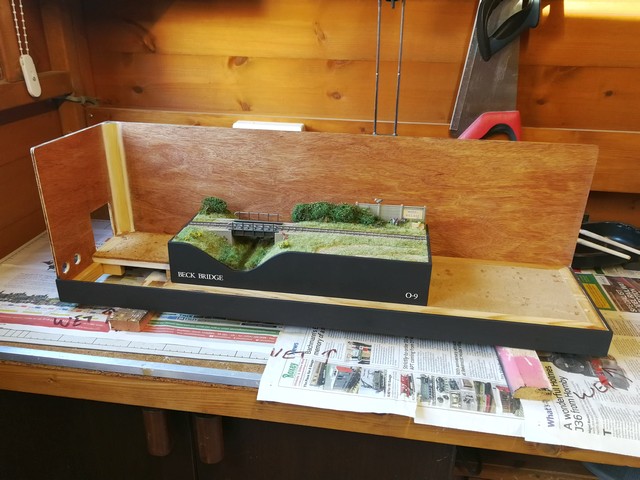
I've been doing a fair bit of thinking and research lately in to what shape any future potential layout project will take (I'm not really close to knowing in case you're wondering). A couple of weeks ago I followed a link posted on the NGRM Online forum for a 7mm scale cardboard caravan kit from modelrailwayscenery.com and having seen the largely cardboard 'Moxley' layout at the Sheffield exhibition decided to see what could be made of a downloadable card kit, all in the name or research!

Here's the result, and it wasn't as quick to achieve this as you might think...


Having downloaded the kit and read the instructions I promptly decided to largely ignore them. They say to print it on 160-180 gsm card but I chose to use lightweight matt photopapaper as it has a much smoother surface. This was then stuck to card of undetermined weight but likely 200 gsm+, using an acid free glue stick. Once dry I then opted to emboss the corrugations in the caravan sides and ends to give a little texture. To achieve this without damaging the prints I printed the relevant parts again on plain copier paper and overlaid this carefully on the parts, then went up and down each line twice, avoiding the windows and doors.


Of course this is pretty hard to photograph once embossed, you can just see it around the door here.


You might be wondering why I left the windows and doors alone. Well, the kit includes a full set of separate parts to overlay on top of the sides to reproduce the frames on a real caravan that sit proud of the sides, but they repeat the printed window detail that is represented on the sides. I had other plans.... I did not stick these parts to the card as per the sides, but cut out the centre of each frame and then carefully stuck each group of windows to clear material (possibly an old overhead projector transparency) using Johnson's 'Kleer'. Once dry I was able to cut out each door/window with a frame and glass, the effect of which can be seen here posed on the printed side. The idea is to get a greater sense of depth.


As can be seen, by this point I had cut abandoned the intended style of construction of folding up the floor/sides/ends and adding formers and a roof, as I felt that would produce something rather flimsy. Instead I opted to cut out the parts and use them around a more substantial supporting structure, made from 1.5mm mount board and treated with Button Polish (shellac). This included internal formers to hold the roof in place and strengthening triangles to reinforce the joints.


I had simplified the roof profile from that printed in the kit as it didn't look quite right and it was much easier to create a simple shallow radius. Underneath the printed box that represented the chassis framework in the kit was replaced with a lattice cut from card and more sections of mount board.


In a fit of laziness, and a desire to move on what should have been a simple card kit build that was taking a lot longer than expected, I sprayed the roof and underside of the structure with grey primer. The next day I added all the printed parts and then some carefully folded corner strips from the matt photo paper to hide the corner joins. Once these were dry I ran a pencil over them to tone down the brightness. I then carried out what could have been a ruinous exercise and gently wafted a can of Humbrol acrylic matt varnish over the painted and printed parts to help seal the print and tone it down a touch. This almost went too white but it is generally OK. Once dry I added the window and door units using double-sided tape.


I find that the contrast between the matt of the sides and the gloss of the glazing and the sense of depth between the front window frame and the printed panel behind is almost enough to hide the fact that the interior is not modelled. It would certainly work as a background model and my thinking is that this and the other caravan kits in the range would be very suited to creating a caravan park behind a wall/fence/bush as part of a backscene, using the sides and ends as flats but employing the embossing and window techniques used here.

I've opted to halt at this point until I decide what to do with it. You may have spotted that I've not added any wheels or the jockey wheel, I was thinking of raiding my 4mm scale vehicle wheels to assist with these.

Colin

Saturday 19 October 2019

The edges of reason

Just as a coat of primer can really bring together a modelling project and make it look 'as one', a unifying coat of paint around the edges of a baseboard can make it look much more complete.

Matt black, from a Wilko water-based paint, has been applied in two coats and hides the bits of filler, nail heads and some of the differences in material in the surrounding edge of the desk-sitter test track.


Other jobs completed or underway are the buffer-stop posts at the ends of the sidings (furniture dowels filed square on the top section and let into holes in the frame) and super-gluing the majority of the track in place so that the pins can be removed as they are too long and poke out below the board. Shortened pins have been retained in the point and around the magnets.

Phase 1 of construction will be completed once the electrical connections to the board are installed. Then I can think about what, or indeed if, scenic treatment will follow...

Colin

Sunday 13 October 2019

Surround and around...

The desktop test-track has been in the workshop this week being fitted with timber surrounds to give it a neat look and hide that it is a bodge of corkboard bits and timber. The end result is a medley of 44x4mm pine strip on the front and right edges, 3.5mm ply at the rear and left back, and similar thickness MDF in the left hand front corner.


Why the piecemeal approach? The original intention had been to use thicker 5.5mm ply as per my dioramas on the rear and left ends with the pine strip along the front (there is a limit to how narrow a strip of ply I can cut!). As the 5.5mm ply is too thick to allow a phono socket to screw in place I used the MDF for the piece where the sockets will be located.


After this piece was fixed in place the decision was taken to use thinner ply on the rear surround so the MDF remains in place despite offering no real advantage (although the drilled holes are probably a lot neater). The thicker ply parts had actually been cut and test fitted in place before the change was decided, hence the title of this post!

Colin

Sunday 6 October 2019

KISS - Keep it Simple, Shunting

After weighing up the options for the new desktop test-track outlined last time, I opted to keep it  simple, with the two siding, 4-4 capacity version. This keeps everything very simple and actually looks quite spacious. Using materials recovered from the previous version the track has been laid and the point wired for frog polarity switching via a slide switch. Other wiring is a temporary setup until the fascias etc are added to the board.


MicroTrains uncoupling magnets have been added to both of the sidings. Having experienced issues in the past with the standard length of the magnets matching wagon length making it tricky to re-couple beyond the magnet, I have followed Michael Campbell's example and split a magnet in two by holding it in a vice and giving it a (less than) well aimed tap with a hammer. The resultant less than perfect edge will be hidden as and when scenic treatment is considered. Yes, it is likely to become a scenic test track over the coming months...


You may notice that not all of the track pins are fully tapped in place, officially this is to allow for track adjustment during testing, however there is also the small issue of the board thickness being a couple of mm less than the length of a Peco track pin!

Colin

Colin

Saturday 5 October 2019

One man's junk... Another man's treasure!

I picked this up at the Sheffield exhibition today for a couple of quid...


I think it is 1/45th or 1/48th scale. I've no idea of the source but looks like a useful supply of parts for 'junk' scenes and I'm having the resist the temptation to plonk the cab and bonnet straight on a Kato chassis as an instant O9 locomotive!

Colin

Thursday 3 October 2019

Desk-Sitting - Again!

I have been spending a lot of time recently considering what the next project might be. I've been weighing up various ideas but nothing that has grabbed me as feasible at the present time. Space is still the major factor, along with it being less attractive to be in the workshop in the recent weather conditions. So I've revisited the desk-siting test track concept again, last publicly considered three years ago...

I thought that I had shared the origins of this board here before but cannot find it - it was last years attempt at a desk-sitter using corkboard technology and a bolt-on fiddle stick, but not learning the length lesson from Up-cycle - too much needed to be cleared out of the way to use it! Here it is in original form...


The track has been lifted some time and the board used for the recent tight curve research and Greenwich coupling tests. As rebuilt I have retained a very short extension piece, only 1 1/4" but that is enough to bring the usable length to 25". The extension is fixed in place and could either be boxed in within the backscene and fascia boards or just left hanging out! The extra length allows clearance for a 3-3-2 inglenook with loco+2 behind the first point or loco+4 behind the second.


Alternatively, there is a one point option with 4-4 in the sidings and loco+3 behind the point and perhaps a bit of allowance for an odd longer wagon.


I'm torn between the schemes, the first could be made to work as a shed scene but as a wagon-shuffling scene the sidings look short compared to the simpler plan. The alternative might be a boxfile project but the appeal of a single board is strong. Hmm...

Colin

Saturday 28 September 2019

Railway Mania - Making a Scene

Whilst this isn't a series that I have been following, I was intrigued to watch/listen to this podcast episode featuring an interview with Gordon Gravett.


The link to the episode on YouTube is here. I would recommend getting a drink prepared (hot or cold to choice) and sitting through the whole thing.

I've been a fan of Gordon's work since Llandydref appeared in the Railway Modeller and subsequently seeing it at exhibitions. I do seem to recall stumbling through this statement when he was viewing Shifting Sands at Burton one year...

Colin


Saturday 7 September 2019

Greenwich Couplings for 009

When I started my 009 project 'The Old Quarry Line' the idea was that it would be largely RTR based to take advantage of the new products coming from Peco, Minitraine and Bachmann. This had been diluted by the chance winning of some Meridian Models kits courtesy of Narrow Planet and then the need for a brake van, which I converted from a Dundas kit. Both of these had received the Peco style coupling but I was becoming a little unhappy with these on such small items of stock. Also, I wasn't too happy with the Bachmann couplers poking out of my WD open wagon.

As I was ordering a few pieces from Narrow Planet, including a cast brass brake handle for the brake van, I added a pack of Greenwich couplers with NEM pocket fittings to the order, and a pack of magnets. An hour or two of bending brass later both the WD and van were fitted with couplings and ready for testing.


I reconfigured my test board from the 6" curve experiments to include a point and two sidings to test the couplers and magnets. Satisfied I then curved the diverging line to 4.5" radius to mimic the 009 layout. I had feared the couplers wouldn't uncouple but the bogie mounted coupler on the WD open tracks very well and the brakevan isn't too bad (and they work equally well the other way around).


Pushed back over the magnet into the curve they re-couple as well as expected (especially with my slightly ham-fisted assembly!)


What I haven't really been able to do yet is test them fully around the circuit, I have a feeling there might be an issue with the loops but that could be resolved by going to a single loop per vehicle, we shall see...

Although I have stuck rigidly to MicroTrains couplers in O9 they do have issues with coupling on gentle curves let alone anything this tight, so I'm keeping an eye on this experiment from that perspective too as part of any future layout planning. Although the Greenwich couples are more time-consuming to assemble they are just about as fiddly as MicroTrains!

Colin

Thursday 29 August 2019

Downsized Diorama

Before restarting work on my 'Beck Bridge' diorama I had completed one of my 'microramas' as an O9 scene incorporating a wooden barrier and some experimental treatment of the grass at the edges of the ballast to look as if it had been weed-killed, a technique I then reused on the larger scene.


Something never quite felt right about this scene, it never gelled in the same way previous efforts had and I wondered what could be done with it to bring some life to it. Eventually I opted to rework the scene in a smaller scale with new details as a base to display items of my 009 stock.

I removed the wooden railing and larger plants and carried out a little reconstruction of the surfacing, filling in the post holes and also scraping back some of the grass to be replaced with basic ground cover. New grass was planted along the edges of the track over the yellowy grass used before, I think there is less chance of weedkiller on this line! The ballast was also coloured using weathering powders to tone it down a little.


Various items were prepared and painted to add 4mm scale detail to the scene. These are mostly slightly modified proprietary items, the fence being Ratio, oil drum Modelscene, the box Knightwing and the sleepers Peco. The WD bogie is a much modified Parkside example that came my way as a 'freebie'. It has had a fair bit of reconstruction using Evergreen 1.5mm channel section and 5 thou styrene using photos on Dave Enefer's website as a reference.

Detail positions were carefully considered, I didn't want to impede the view of the chosen locomotives and stock, in this case 'Isla' and the Penrhyn quarryman's coach.

I am much happier with the revised micro diorama, but that is not a reflection on the change in scale, more a realisation that the original was pitched wrongly....

Colin

PS, whilst I think about it, I know that technically the diorama hasn't changed down in size, but the scale has.... 

PPS, it now represents a bigger area so it is in fact actually bigger. I think...


Wednesday 21 August 2019

All-terrain Ice Cream

 A couple of years ago whilst wandering around Whitby I discovered this Land Rover ice cream van, and thinking it quite unusual, took a couple of pictures for reference.


I hadn't appreciated at the time that this was a (reasonably) common Land Rover use (not thinking to Google it!). Whilst in Norfolk earlier this month I found a couple more examples actually using their all-terrain ability and travelling along the beaches bringing ice cream to the bathers.

The first was in Hemsby.


The second literally followed us along the beach in Scratby, first appearing almost mirage-like on the horizon before eventually catching us up. Of course we had to stop him and buy one (or four).


This is actually quite a new one compared to the others, with very swish alloy wheels. Somewhere I have a set of those from a Cararama model.... The old Airfix plastic kit might be a good starting point for a 1/43rd model as it ought to be easier to cut about than a die cast model.

Colin

Wednesday 14 August 2019

Norfolk Wanderings 2 - Wells Harbour

On our return journey from the East Norfolk coast we diverted via Wells-next-the-Sea to visit the Wells Harbour Railway.

When I first travelled on this line, more years ago than I can remember, I travelled behind the steam locomotive 'Edmund Hannay', which we later had in the 'Rails to the Sands' exhibition in Cleethorpes sat opposite my own 'Shifting Sands'.

Nowadays three internal combustion locomotives hold fort, all built by Alan Keef, and I had wondered why they needed so many. On seeing it operate, it becomes very clear, as the service intensity of every 15 mins would be quite intense for one locomotive every day of the week, so having back-up and maintenance cover are essential.

Here is 'Howard' on one of the minuscule turntables (sized for the old steam locomotive) at Pinewoods.

48511252191_25f686b967_z.jpg

The unusual coupling system employed between locomotive and train:

48511249616_f012e777b7_z.jpg

Here seen ready to depart from the town end, taken from the sea defences:

48511243386_3c70c9fb75_z.jpg

More pictures can be found on Flickr.

Colin