Showing posts with label Scenic modelling. Show all posts

Saturday, 18 July 2026

To The End

I think I'm now at a point where I can say that 'To The End...' is now as complete as it can be. The lower edges of the board have all now been painted with grey primer/undercoat, three coats with some light sanding in-between coats and the final coat applied with a sponge roller. 

I've also fixed the backscene board in place. This is a piece of hardboard, not the most ideal of materials as it has a tendency to warp when un-framed. Unusually this piece is actually double-faced, having been salvaged from an old wardrobe, and had already been primed both sides and painted sky blue on one as part of another project. Newly cut edges were touched in with primer and everything was going well until I dropped the board and damaged a corner! Argh!! 


Luckily the damage was repaired with liquid superglue to bind the corner, then Milliput to smooth away the damage. Paint was then touched up, luckily I found the remains of the exact blue used on the front of the board. A white car primer aerosol was then used to lightly coat the front of the board as the blue was both a little too bright and a little too satin in finish. The board was then screwed in position.

The board's main function is really to protect the tree, both in storage and when on display. Of course I have nowhere to stand this on a regular basis but it will hopefully appear in public alongside 'Odsock Corner' later in the year. It isn't really much use for photography as the tree casts internal shadows on the backscene, ironically it works better without the backscene and with my white reflective sheet behind at a slight distance. The shadows on the sky can just be seen to the top left of this (cropped) trial shot.


Having said I am about finished, there may be one more addition, possibly as a removable feature. It would need a couple of blocks of wood to raise it off the rails, but would pick up on the "abandoned miniatures" theme that this scene started out with as a micro diorama...


Colin


Saturday, 4 July 2026

A Scenic Sprint (To The End)

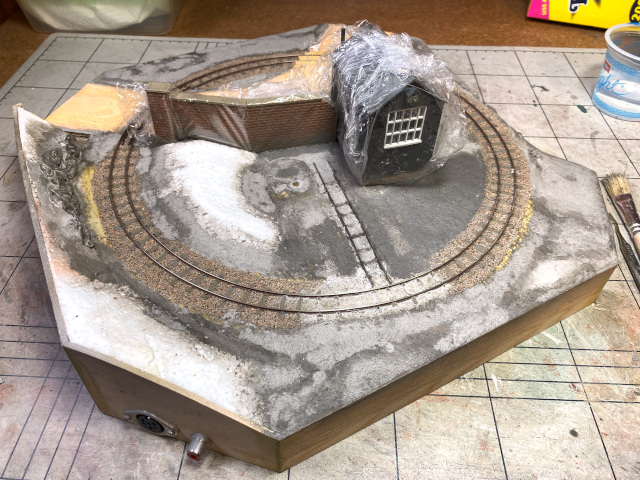
Confession time... I have not really been taking many photos of progress of the expansion of my 'To The End' diorama. I've fallen out with my bridge camera and my phone camera doesn't always get the result I'm after. Therefore there is a jump from the last post to the next image, and then we'll find that this is really the last proper "work in progress" shot... 

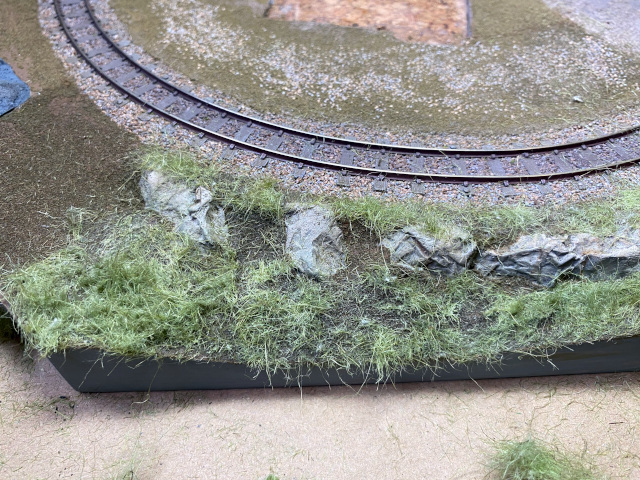
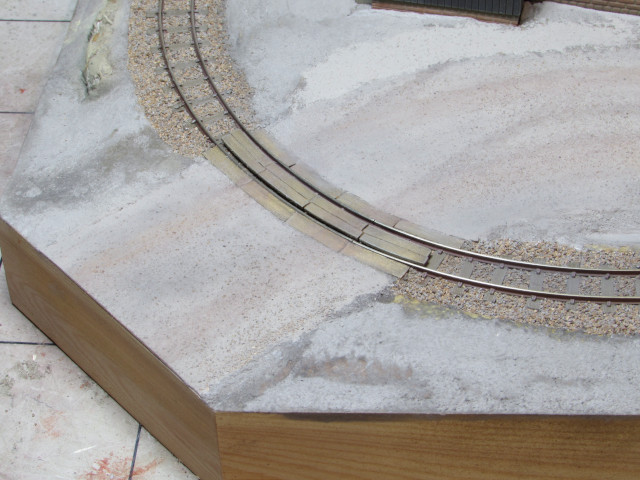
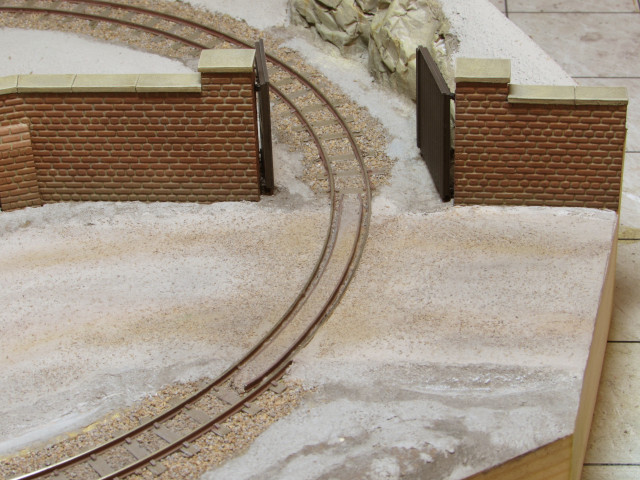
By this time I had added two more layers to the basic groundwork, one a layer (in some places two) of Amazon packing paper used with dilute PVA in a sort of papier mache to add a consistent surface over the card and DAS clay, then a layer of my usual paint/PVA/tile grout mix, with Woodland Scenics fine turf sieved over whilst wet. In between these layers the track was ballasted and whilst looking for materials to match the original mixture, I actually found that very mixture, result!


The concrete area was extended from the small area on the micro-diorama. I had the original Green Scene tub with this material in, but opened it to find that it had dried out. Originally this paint had some sort of powder in it, with a liquid carrier, and the dried out lumps were still powdery... could I grind it back down to a powder in a pestle and mortar, and reactivate it? Adding the powder to Hobbycraft Matt Medium I soon had a paste that resembled the original product and I could use it on the new area to extend the scene. Despite the plan being to use static grass for the new grass work, I then opted to further blend old and new by adding some hanging basket liner in around the edges of the trackwork and concrete areas to help everything blend in. 

At this early stage I was experimenting with groupings of scenic items, in an attempt to add interest to the scene, and hopefully use up some items that have been awaiting their day for a while, such as these Ravenglass & Eskdale inspired fencing panels. These were actually glued in place during the static grass work and from that point on, things just grew organically, or so it seems...


I cannot possibly describe everything in detail, but to summarise, I have:
  • added further leaf litter around the track to match that on the micro diorama,
  • added static grass in a mixture of colours, aiming for variation but keeping it subtle,
  • created bushes/hedges from teased rubberised horsehair, with static grass fibres added a la Gravett, then foliage, and avoiding foliage matts to get a better effect,
  • reinstated the fence, with a new section running into the hedge that was originally created for Odsock Corner,
  • added detail/texture to the grass using MiniNatur flowers, Martin Welberg weeds and some recently acquired products.
The tree is the half-relief one completed in 2022 when attempting the Avalon Brickworks style layout. I had to remove about 2cm from it's height so it will fit in the Really Useful Box, and re-create the flare/roots at the base (then hide them in the undergrowth!)


On the micro diorama the front corner was occupied by a wheelset and a crate with a lamp inside. For the expanded scene they are joined by a bucket, keg, pallet, paving slabs and a saddletank that was originally for a model of 'Badger' but has again been painted up for some time and waiting in the wings for use in a scene. It has just been explored by a rabbit, who is looking over towards a bush from Green Stuff World from a pack I bought in a wargames shop in Bridlington on holiday last year.

More soon...

Colin


Saturday, 22 March 2025

'odsock Corner - Flora and Fauna

'odsock Corner is reaching a point where you might say that it is nearly complete (on the basis a model railway layout is never actually complete!) Since it's last appearance here there have been several enhancements to both the natural scenery and the man-made junk. The overall view below shows the current state of work, with the third tree in place back-left and lots of new smaller details.


Seen before they became lost in the undergrowth are some of the "animals of 'odsock Corner". From left to right, we start with a minor celebrity, "the Brookford Pheasant", obtained from the fabled Brookford layout some time ago; two rabbits from Northumbrian Painting Service, bought at the 7mm NGA event at Mickleover along with some pigeons who we will meet later! The cat is an Omen casting, and the duck from Duncan Castings. All apart from the pheasant were painted by myself.


The pheasant is lurking under the new tree, where I also added in some variety to the undergrowth with some Mininatur flowers and a raspberry bush. On the junk pile you can just see a child's trike in the bushes to the right. There are other new additions behind the tarpaulin and they are actually posed in such a away that you really cannot get the camera in to photograph them! I did try, as you will see later... 


Those pesky pigeons have taken up residence on the roof of the office building, and have left their mark using a stippled mixture of green-grey and yellow paints. I've also added a fair bit of moss growing on the lower rear edge of the roof under the tree. Other additions to this area are the bucket and the bin to the left of the hut, both West Hill Wagon Works 3D prints, and in-between these one of the rabbits is minding their own business. The ex-Shifting Sands bench, the cat and the lamp post all add more interest to this scene.


More Mininatur flowers can be seen around the layout and around near the gateway the other rabbit is seen. This area is also the home of the 'lost' duck. There is a puddle there which he has obviously mistaken for a much bigger expanse of water!


And finally... an attempt to see the extra junk in the centre of the scene. I suppose it is quite atmospheric! The carriage door is an Avalon Line left-over from the railcar conversion, but in front of that are some redundant bench ends lying flat on the floor, you'll have to take my word for that...


Colin

Saturday, 1 March 2025

Through the Gateway

Heading through the gateway featured last week finds further scenic finishing in place. In the area between the tracks and trees I added brambles using both coir hanging basket liner and a small offcut of rubberised horsehair as the basis. Both were teased to shape and sprayed with Humbrol matt brown before being glued in place with PVA, sprinkling some fine turf ground foam over any exposed glue.  Once dry hairspray was used to fix Woodland Scenics foliage mat in place with a sprinkling of loose material to complete.


The triangle to the right of the felled log will soon be host to a little extra junk and more growth around it. Across the line I added more hanging basket liner based undergrowth/brambles to the area around the location of the third tree. I had originally intended to add higher hedgerows here using rubberised horsehair but found that it looked out of balance visually and put the pieces to one side for another day. 


When adding further material to the bramble patches, over-spray of the hairspray into the static grass caught some of the loose foliage material and gave a pleasing effect of growth within the grass. Having used similar techniques within hanging basket liner grass before I had intended to experiment on the static grass anyway, so rather than put it off for another day, I opted to add some growth around the tree stump.


Darker green material was used on the longer grass around the stump itself, whilst in front some lighter green and yellow material from Green Scene gives us the look of daisies in the grass. I find that adding effects like this can really enhance the grass areas so I went on to add more in several places around the layout.

More soon...

Colin

Saturday, 22 February 2025

Saturday Snapshot V - Growth

Although there are still some areas to revisit and enhance, I'm pleased to report that 'odsock Corner has finally reached the stage where all the scenic ground cover is in place and there are no (unintentional) patches of bare earth. The previously turf-only narrow strip along the back edge of the layout can be glimpsed here through the gateway sporting a mixture of wild grass and brambles. 


A recent purchase of Green Scene 4mm straw grass, mixed with other longer grasses I already had to hand, has allowed me to create a pleasing colour and texture different to the other grassed areas on the layout. The brambles added along this edge and in the centre of the layout, use coir hanging basket liner material as a base and Woodland Scenics foliage material, with some added effects. Foliage creeps over the wall to effectively disguise the point it cuts off at the baseboard edge.

Colin


Saturday, 15 February 2025

That tree in the corner...

In best railway tradition, this post is running late, at least a fortnight and possibly a month! It has got close to being published a couple of times but I really wanted to get the heading photo right and for various reasons it has taken a few attempts. 

We last featured this tree back in December in Twigging On when it looked suitably wintery and bare. it has now progressed scenically by about six months to be in full bloom. This is a task that was taken steadily and whilst usually a workshop task, the cold weather actually saw it completed in the house with a lot of cleaning up after each session.


Over the course of about a week the tree was fully foliaged using Woodland Scenics material, matt medium and hairspray, getting to the halfway point on the Sunday evening and completed on the weeknights.

The base layers of teased-out foliage material were secured to the branches using matt medium, working around the tree from the lower levels upwards. After the matt medium was dry on a level,  hairspray was used to secure additional material over the first layer to build up the effect of bushiness. 


Being indoors allowed the matt medium to dry fairly quickly so I could go away, do something else and return to take the next steps, then repeat... Working up the tree this way makes for pleasant, short working sessions before the task becomes too repetitive or the mind wanders... Once each layer was complete more hairspray secured the foliage in place and some lose material from the packet was sieved over to tree to further add to the layered effect.


Although nominally complete in the picture above a few extra layers of foliage were added to the top of the tree before I was satisfied enough to call the process to a halt, with the final result as shown in the heading photo.

Those paying attention and taking notes may notice from the heading photo that despite my careful planning to get items in place below the trees, there has been a re-arrangement of the various elements, hopefully giving a more coherent look. The broken Hudson wagon frame has been turned around and propped up on offcuts of timber, with the intention of having the other wheelset in front of it once modified and weathered. The cement bags have been placed on the floor near the slabs and just in case you needed to know they were cement bags, the top one has a clue added... 


A few extra items of junk are being produced to add a little more to this scene, hopefully to break up the linear feel everything has to the present time.

More soon...

Colin


Saturday, 18 January 2025

'odsock Corner - Trees, Leaves and Junk

We left 'odsock Corner' with the office building and walls in place and the next stage was to start to infill the central section of the scene. There needed to be a certain order to this to avoid having to fiddle around adding items under the trees once they were fixed in place. The eagle-eyed will notice that since they were last featured some of the items being used have changed, such is the nature of layout development.

The first notable change is that the post and rail fence that I created to go alongside the office building has been replaced by something a little more makeshift in the form of a wattle fence panel supported by three weathered offcuts of cocktail stick. 


The fence panel itself was one of a couple of items I acquired in the sell off of bits and pieces from the well-known 7mm standard/narrow gauge layout 'Brookford' a few years ago, I think it suits the location well as a makeshift but elegant solution in an estate setting.

Behind the fence another change in plan sees the wagon in the siding changed to the Hudson skip frame with broken axleboxes that I created a few years ago. Until very recently it had been in place on 'The Headshunt' but it actually looks better in context here. In the photo below I was trialling the arrangement of various bits and pieces that needed to be fixed underneath the tree.


The sheeted object is a Ten Commandments casting, the pallet and oil drum Knightwing and the oil can from a Cararama set. The wooden crate and sacks piled on the wagon are Black Dog Mining castings. The paving slabs propped up against the wall are home-made from mounting card. As part of the process of placing these items I wanted to add in a layer of leaf litter around several areas under the trees, This mix of brown scatter, dried tea leaves, crushed Green Scene leaves and various other materials was applied over a layer of WWS basing glue and additionally secured from above with dilute matt medium.


With hindsight I perhaps have some over-sized material in there, the Green Scene leaves did not break down too well in a pestle and mortar, I don't run to a coffee grinder ala Mr Gravett but it would probably be better. I may revisit/refine this mixture before too long. A similar mix was applied on the road side of the wall but I actually think I got the balance about right here in terms of material size. I really must add some vegetation climbing over the wall itself at some point...


Work is now underway to add foliage to the remaining tree and after a bit of a saga I have the spray paint required to add a little colour variation to my base material for bushes and brambles so hopefully if the weather isn't too cold and the workshop not too inhospitable, some more progress will be made soon.

Colin


Saturday, 4 January 2025

Saturday Snapshot IV - Progress

After all my grass-growing woes of the last month it is very satisfying to bring you this image of how far things have come in recent weeks. The walls and office building are now fixed in place and hopefully it won't be too long before the trees are too...


The weather forecast for the weekend ahead is probably telling me not to spend too much time out in the workshop but we shall see what is possible, I think hairspray dries better in cold weather than PVA, right?

There are a few new developments to come in the next few weeks and maybe one or two changes of mind, watch this space...

Colin


Wednesday, 1 January 2025

The Green Grass of 2025

A couple of weeks ago I expressed my frustration with my latest efforts to use hanging basket liner grass and that I had purchased a static grass applicator and started experimentation... 

After several colour tests and experience-building sessions on scraps of cork and hardboard I was ready to add some colour to the layout itself. My applicator is the WWScenics Pro Detailer which is ideal for the sort of small projects I wish to complete. Whilst there are a few areas that may benefit from a further layer, I am largely happy with the effect so far.

My initial stock of grasses also came from WWScenics and I may have picked one that was a bit on the bright side. I had it in mind to try and match the sort of colours that I achieved using hanging basket liner and one shade I chose was far too bright. A quick search of eBay found a shade from Woodland Scenics that fitted the bill so an order was placed and further experimentation took place. I wanted to be able to blend with hanging basket shades as I had successfully added a few extra areas of this as shown below, prior to applying the static grass to see how the two could co-exist.


The shades used in the end were a base layer of 2mm WWS 'Muddy' followed by a blend of  4mm Woodland Scenics 'Light green' and WWS 'Muddy'. In places another layer has been added of 6mm WWS 'Patchy' to add variety. I think the colour-blend has worked very well although the static grass is still a touch greener than the hanging basket grass, where it is still visible!


Despite appearances there is still a lot more to do to the grass, adding ground foam etc as I would usually do, plus other growth here and there to break up the texture a little more. There is also a requirement for plenty of leaf litter under the trees, creation of which is now underway.

A quick word for the team at War World Scenics for their excellent customer support after an issue (self inflicted) occurred with my applicator, thank you WWS!

Wishing all readers of O9 Modeller a Happy New Year.

Colin


Saturday, 14 December 2024

Hanging Basket Liner Blues

Regular readers will know I've been an advocate of using hanging basket liner to represent grass for about 20 years now, resisting the more popular methods of grass application that have become available... until now. 

Having got the basic ground cover in place I was ready to start the application of hanging basket grass in my usual fashion by laying down neat PVA and applying the brushed hanging basket, letting it dry and pulling the backing off before manicuring it as desired. It failed, twice over. After several sessions I had a very patchy effect and several areas had no effective grass "growth".


I had used my usual PVA, twice. Some of the PVA was absorbed into the material and not bonding to the ground surface. This current PVA is a just post-Covid purchase and I'm not convinced it is as good as the old stuff. I then tried Gorilla PVA and had better results but not perfect, still ending up with some areas entirely not stuck down. I then tried a coat of Matt Medium on the next area to seal the surface first, but it made little difference. The photo above was the result - it may not look too bad in the photo but there should really be grass everywhere...

This is a closer view, PVA was applied across the whole area in front of the rocks!


I have put some of the issues down to the coldness of the workshop during the week I was laying down the grass, hovering a few degrees over freezing most of the time. I have had a few fails before but never to this level and frankly not to this level of disappointment. I have now stripped back a lot of the current grass, sealed the surface with Matt Medium and added a thin layer of ground foam to start again. At around the same time I fixed down the resin tree stump and blended in the ground surfacing around the base.


Whilst I am still a big proponent of this method of creating grass I decided that I could do without the hassle and I therefore bought myself an early Christmas present in the form of a small static grass applicator. Experimentation has begun...

Colin 

Saturday, 7 December 2024

Twigging On

A few weeks ago I posted a picture of a twig pretending to be a tree as part of my sketching out of the scenery for 'odsock Corner. Shortly afterwards I started to rework the twig into a tree using some old Hornby wire foliage branches (from the Skale Scenics range 10-15 years ago), removing their lumpy foliage and supergluing them in place on the adapted truck.


At this point I did propose to use another twig to make something a little taller and narrower to better fit this location. It had only taken a couple of hours to get to this stage and I planned to store this  for future use elsewhere. However I then decided to make changes to the existing frame by pointing the branches upwards rather than outwards, and twisting in some extra smaller branches at the extremities. I then used modelling clay to smooth out the joins between the twig and the branches.


To further blend the wire branches to the trunk I mixed up some of my remaining scenic mix of paint/PVA and added in some tile grout to stiffen the mixture, I had hoped this would be a good basis for bark but it dried quite light.


Contrary to popular opinion, tree trunks are not brown, more a grey-brown-green mixture and to create this effect I started with grey primer and Humbrol brown spray paints, spraying uneven coats of them both to create a mottled effect. The brown can was splattering quite a bit and gave up shortly afterwards, another one to add to the shopping list!


To blend the colours together and add shadow into any recesses I gave the tree a wash of black-grey all over and when this was dry I dry-brushed grey-green over the lower trunk and branches, getting as far up as I could angling the brush between the branches. This gave a very pleasing effect and I had one of those "stop" moments before I went too far!


After all this work to the armature I feel that I have achieved a much better shape than I had initially created and a very satisfactory colour. It is now ready to add the foliage in due course before planting it in place on the layout alongside the modified Hornby tree (which requires a few further changes) and the recently purchased fir tree.


More soon...

Colin

Saturday, 30 November 2024

'odsock Corner - Bits and Pieces

Where does time go? Work started on these items back in September and has proceeded embarrassingly slowly...

Over time the lamp and the wagon with the missing planks were joined by a few other pieces as ideas developed, the tree stump making an appearance during layout planning and is a Steve Bennett casting. All finally received a coat of primer and were painted over a few weeks and were matt varnished on the weekend just before the weather turned a lot colder. 


The fence is cobbled together from Slaters left-overs from a childhood project and would have been easier to start from scratch but I like to recycle... Also recycled is the bench, another S&D kit, one of a few bits assembled and painted by my Dad for Shifting Sands. It was later removed in favour of a Peco telephone box and I have restored the paintwork on the planking where a figure had been removed leaving the brass strip exposed. It has hidden itself rather well with just some careful colour matching and then dry brushing to match the shade of the lamp post.

Colin


Saturday, 16 November 2024

One for the Road, Two for the Trees

Although I was happy enough with the roadway on 'odsock Corner I felt that it fell short of representing the rough surface of a obscure countryside trackway. The area that I was happiest with was the second crossing where I had a good basis for the areas worn away by traffic and time. I was convinced that I could get a better texture and colour...

Another mix of paint, PVA, tile grout powder and fine ballast was created, this time with more brown paint to warm the shade. This was laid over the original surface but not consistently, creating variation in tone and level. Whilst the mix was wet yet more fine ballast was sieved over and tamped into place to create further texture. 


I then let it dry overnight before the temptation to tinker set in. The following day further sanding of the surface took place, then some cunning setting of the resultant debris using matt medium. Another overnight to dry and weathering powders were used to add further colour variation to the various areas to represent those places where the dampness always seems to linger longer.


With plenty of mixture left over and knowing it would not keep, the area in front of the office building and around to the disconnected siding were treated, in front of the office I added both ballast and ground foam to the wet mixture to represent a rudimentary gravel path in the earth. As with the surplus of the first road surface mix, I also took the opportunity to coat the areas of ground formed from paper laid over polystyrene. Once everything was dry the grunged-up area of track had some shading added using weathering powders.


I do like the way the siding squeezes between the office and the tree... talking of trees, you may spot in the photos above that something curious might be going on... I had established early in the design process that I would use a Hornby Skale Scenics tree that I re-foliaged a couple of years ago, but I had a feeling that I may need a little more. Back in May I purchased some fir trees by 'Model Scene' (not the Peco brand) from CM3 Models with no real purpose in mind (other than joking about turning this layout into another Christmas scene!) but with the scenery now well under way I decided to try one in the gap next to the other tree. 


It has no trunk to speak of below the branches so is actually floating in fresh air at the moment. The flash of red through the leaves is a clip holding another idea in place. This twig was pruned from a bush in the garden last year along with a couple of others with their use as tree armatures in mind. A tree in this location was indicated on the mock-up but it is close to the edge of the board so will require some care and thought to create something that will not clash with the covering box.


Of course all of these trees are actually under-scale but at least they have enough height to not look too wrong in proportion to the small space of the layout. With plenty of smaller shrubs and bushes around I think the overall result will be effective.

Colin


Saturday, 19 October 2024

The Road to Nowhere

With the rockfaces on 'odsock Corner coloured to an initial satisfactory finish my attention turned to the road surface. My aim is to achieve both of these finishes prior to general ground surfacing, in order to allow the latter to overlap in a realistic fashion. The basis of the roadway had been laid some time ago in the form of mounting card and treated with button polish to harden the surface. I had intended to then follow a similar principle to that used on 'Shifting Sands', only to find, much to my surprise, that the Green Scene product I had used 18 years ago, had dried up...

The first step I took was to weather the planking on the first crossing, using various washes of acrylic followed by dry brushing in weathered wood shades. The centre planks are not yet stuck in place and are out of line in the picture.

The roadway itself is a concoction of grey tester pot paint (with a spot of brown), PVA glue, grey tile grout powder, very fine sand and the finest material sieved from my ballast mix. This was applied liberally over the roadway, adding in extra loose ballast material on the surface where required, in particular around the second crossing and to the right hand side in the areas that I had previously excavated in the road surface. The surface was stippled whilst wet to add some extra texture to the surface.


Once left overnight to dry I revisited the surface and despite my texturing I actually went over it with 400 grit wet and dry to smooth it a little. This had the added bonus of removing the mixture from some of the ballast in the mix and adding some further variation of colour. I then spent some time with watercolour paints and weathering powders to further vary the surface colours and add impressions of tyre tracks and wear.


Despite looking complete, this is really a base for further work once the surrounding scenery is in place, I can foresee adding some further "loose" material and some cracking to really get the impression of a broken-up surface.

More soon.

Colin

Saturday, 12 October 2024

Saturday Snapshot III - Rocks

As anticipated I have applied some colouring to the rocks around the pizza layout using various shades of acrylic paints in the beige/grey spectrum. Dry-brushing has brought the rocks to natural shades including green at the base of the rocks to represent a damper area and staining from vegetation growth.


I've also added water stains running down the faces of the rocks, maybe a bit too obvious at the moment... There will be another round of dry-brushing in due course to add a more sandy/yellow tint and as scenic work progresses there will be moss/lichen effects to add using ground foam etc.

Colin


Saturday, 5 October 2024

Low Cost at 'odsock Corner

I spend a few idle moments a week watching videos on YouTube, as I suspect many of us do. Railway modelling is only one of several topics I follow but I have noticed that there is an increasing number of commentators talking about the cost of new products. Yes, railway Modelling can be an expensive hobby, if you want it to be...

I'm time, space and cash limited, buying new RTR products is not on the agenda, notwithstanding the fact I mostly model in a scale where RTR does not exist, the temptations of a Quarry Hunslet in 009 or NG7/O-16.5 have (so far) been avoided. Even many of the newer, closer to home temptations of quality 3D printed O9 models have not yet drawn me in. I actually find at the moment I'm happier in the workshop with recycled card and polystyrene, PVA and DAS modelling clay creating the foundations for a miniature world.


I realise that I am out of step with most of the (railway) modelling world by appearing to spend so much time on my groundwork, but in reality there aren't that many hours in what you see here, just spread out over many weeks! For instance this last week more clay work was the initial focus of work, with Isla assisting around the side and back of the office building. This included the last vast expanse of  exposed corrugated cardboard, in reality a double-corrugated sheet with the top layer carefully peeled off when I realised it was too thick, leaving a rather weak exposed inner layer. Getting it all covered up will make life a lot easier in the long run. 


In between the clay sessions with Isla I had added clay to the two outer areas to blend in the different levels and hide the joins with the outer timber strips. My attention then turned to how to initially cover the polystyrene areas ad in particular it's join along the timber strips. I really didn't want to use tiny bits or mod-roc and the mess that brings. The quick and easy alternative was to recycle the brown paper that you sometimes find in Amazon packaging, torn into strips and applied in two layers with lashings of PVA (hence the sheen catching the light). Again I had some assistance with this task... On the edges of the board the strips were laid oversize and cut back once the glue had dried. 


The eagle-eyed may spot that during the clay work I filled in the extra holes that I had made whilst finding the optimum position for the tree, allowing for accurate location in due course. The basic  foundation of my groundwork is now complete and attention can turn to the next stages, which will be colouring in the rock formations and surfacing the roadway, before moving on to the next stages of surface coating. Whilst good quality scenic material does have a cost, by working on a small project I don't need the vast quantities that some of the YouTubers must require, and I have enough in hand not to need to buy anything at this stage...

Colin