Showing posts with label Simplex. Show all posts

Saturday, 9 November 2024

Beyond the Kato 11-109 - the 11-108!

Back in February I completed number 6, a Simplex from FK3D styled on the Abbey Light Railway's 'Druid'. This ran on a Kato 11-109 as intended by the maker, although I had revealed a little more of it by removing the false 'skirt' under the underframe to make the end result more realistic. However, I always thought that it looked a little too 'perched' on the chassis, in particular too much clearance under the re-railing bars was a bit off-putting.

The inspiration for what follows was actually my yet to be built FK3D Lister locomotive, which takes advantage of a feature of the new-generation Kato chassis being built around a 'core' of weights holding the motor, flywheel, drivetrain etc to the point that the upper cover really only stops things falling out of place. I had also discovered the version of the Kato chassis (11-108) that had very little detail and was in fact noticeably narrower than the fake locomotive sideframes of the 11-109. My initial thoughts to somehow use a chassis without a cover and wondering how to fix it in place, turned to using a further-reduced 11-108 to lose 1mm in ride height.

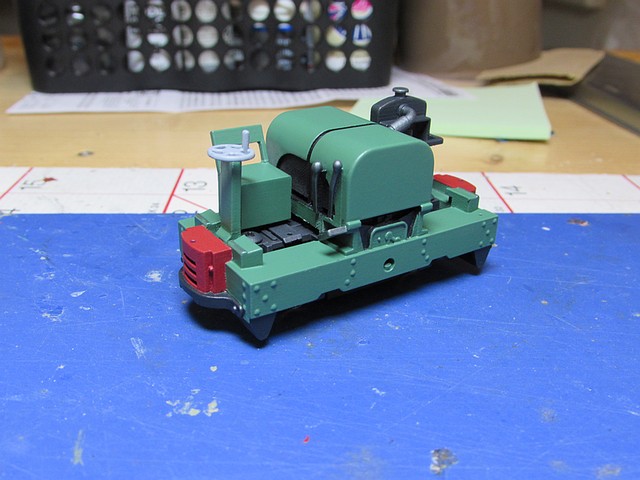
The starting point, number 6 on a 11-109, with a frame height of 14.5mm and the 11-109 sideframes filling the space underneath.

The alterations required the the 11-108 chassis (stock Kato image used). The aim was the leave a raised area in the centre to match the opening in the body of the 3D print. In particular I will draw your attention to the cut at the right hand end of the top - do not cut to the right of the raised area as this will remove the clip that stops the motor moving backwards, I started this but soon realised my error! Cut along the opening about 1.5mm in from the edge instead and then file down the area to the right. All cuts were made with the top cover removed from the motorising unit.


The resultant conversion is seen with the original 11-109, we can see how much narrower it is and how the end platforms are lower than the 11-109 frame. The areas over the axleboxes were at about the same height as the 11-109 frame but I have chamfered them away to fit into the cut-away area under the body. I have painted the axleboxes matt black to better hide them and switched the baseplates over to give the new chassis the sprayed matt black one from the original chassis. 


In order to secure the new chassis in place I have used two screws which pass through the endplates into holes drilled in the underside of the body, centre at the rear and to one side at the front. As the motor protrudes out of the top of the cut-down chassis I had to remove an area under the bonnet of the print and reposition the weight that counterbalances the whitemetal driver figure. This view shows the slightly angled areas that will form the main interface between the new chassis and the body, inboard of the strips that sat on the 11-109.


The end result is a 13.5mm measurement to the top of the frame, bringing the rerailing bars closer to the rails and looking a lot less perched with the bonus of fresh air between the axleboxes and the ends of the loco.


So, was it worth it? I think so! Now you might be wondering why I didn't just cut away the old frame and carry out the same modifications, well I find the Kato plastic a little awkward to work and the less I had to remove the better, especially along the length. I also have memories of taking too much away from a 11-103 in the past and actually rendering it useless... but at least I have a spare motor for my older locos...

Colin

Monday, 26 February 2024

Finishing Touches for Number 6

Work progresses on the FK3D Motor Rail 'Simplex', firstly with a little weathering... 

Initially I focussed on the underframe, where I first sprayed with Humbrol matt varnish before starting the weathering itself. To achieve this relatively easily I used post-it notes to mask off the bodywork during the spraying. This gave a much flatter base to work the weathering into, including colour washes, dry-brushing and a few oily/wet patches. On the bodywork some lighter blue was dry-brushed around the body edges to give a lightly-worn effect and weathering applied to the grilles, chimney/exhaust and air tank on the bonnet top. 


Once I was happy with the weathering I glued the driver into place using the pin in his posterior in the hole drilled into the seat support, having to clamp him down whilst the glue dried as otherwise he did not sit into the seat properly. Unfortunately his feet don't quite touch the floor but I'm not sure what I can do about that! The cab roof was then glued in place and again had to be clamped as it had a slight bow to it. 


At this stage I had thought I was finished but having revisited David Malton's drawing in the Railway Modeller I realised that 'Druid' retained the Motor Rail handrail at the bonnet end despite there being nowhere for someone to really stand and hold on for dear life! I therefore fabricated one from 0.9mm brass wire and soldered it together in an improvised jig.
 

After cleaning up the soldered joints the handrail was blackened and then painted to a faded black finish and sealed with matt varnish, before carefully gluing in place into two carefully pre-drilled holes on the front footplate.


Photography of the completed loco on the mini-diorama and 'The Headshunt' shows how well the Kato chassis vanishes into the murk in layout conditions. I believe taking the skirting away from the base of the print has really made a difference in this area. However, the finished loco is currently residing in the display cabinet on a shelf at eye level, where the chassis is all too conspicuous...

Colin

Saturday, 17 February 2024

Simplex Number 6

Since I last posted about the FK3D 'Druid' print a couple of weeks ago I've been busy with the paintbrushes and masking tape and the result is an LCLR-style Simplex. One of the downsides of the (almost) all-in-one print is that delicate masking is required between the underframe and the bonnet/cab areas to get a neat result, but well worth the effort. 

The blue is Citadel Lothern blue as used on my 009 LCLR coach and loco, applied in three coats with the paint thinned as required to help alleviate brush marks. The red and black from Vallejo, the latter reduced in blackness with a spot of WW1 beige. The whistle was picked out in Vallejo brass whilst the printed oval plates on the cab sides and rear, which had troubled me at first, were painted black with white boltheads to complement the numbering, taken from a Replica Railways 4mm scale 'Rail Express Systems' rub-down sheet. Number 6 reflects the running number of 'Druid' at the ALR, despite this being a freelance interpretation.


The cab interior was treated with a coat of thinned black-grey and then various items were picked out in different colours. This was actually quite tricky to reach some of the features. The driver figure is the Monty's 'Industrial Driver' figure that I had prepared for the O9 railcar last year but didn't use as he was slightly on the tall side. A length of 1mm brass wire was Araldited in a hole drilled in his posterior and a corresponding hole drilled down the seat support to accept it. Milliput was used to add some "shape" to fill the bucket seat in the cab (Thinking about it, I may have flattened out his original shape for the railbus project...).

The driver has had a touch-in on the original paint job and a waft of Humbrol matt varnish. The loco itself has had a coat of Halfords matt varnish but is actually quite satin. I'm hoping this can be knocked back with some careful weathering and since taking the photos I started this process by masking the bodywork with post-it notes and spraying the Humbrol matt varnish over the underframe, which has the immediate effect of knocking back the shine.

Colin


Thursday, 1 February 2024

A Simple Simplex

The FK3D 'Druid' print has been selected as my next O9 project and outwardly it really did not need much work as it stood, just the removal of the support struts in the cab openings. However to add a touch of individuality I opted to remove the skirting under the underframe and around the axleboxes by a combination of cutting an drilling. A fine razor saw was used to make 6 cuts on each side, behind each re-railing bar and either side of the axleboxes. I then scored along the top edge with a craft knife and drilled out a series of holes to weaken the skirt. With a pair of pliers I could then cleanly remove the excess and clean up the edges using an emery board files and wet and dry sandpaper. 

Whilst this approach reveals a lot more of the Kato 11-109 chassis I feel it also makes the loco look a lot better when sat on the track, as the rails are visible and it looks less like it is hovering. The fuel tank and ladder on the side of the Kato chassis have been cut away to make it less obvious at a casual glance.

The only other change I have made is to strengthen the top edges of the cab sides with a length of 0.5mm handrail wire formed into a long 'U' section between the ends, just visible here after primer had been applied. The fine cab detail of the print is clearly visible, I have adapted a driver figure but he is being camera-shy at the moment. 

The print has had an initial coat of plastic primer followed by a rub down, a small amount of filling on the cab front to hide a print line and then a second coat of grey primer. It really has been that simple. The intention is to use a Lincolnshire Coast LR style light blue livery, I've always felt that 'Druid' had a lot in common with the LCLR style!

More soon...

Colin
 

Sunday, 1 November 2020

Humberston - 009 Micro Diorama

Regular readers of this blog will be familiar with my Micro Dioramas, 70mm deep scenes designed to fit on the shelves of a wall-mounted display unit. There's a bit of a history here: A Brief History of Microramas

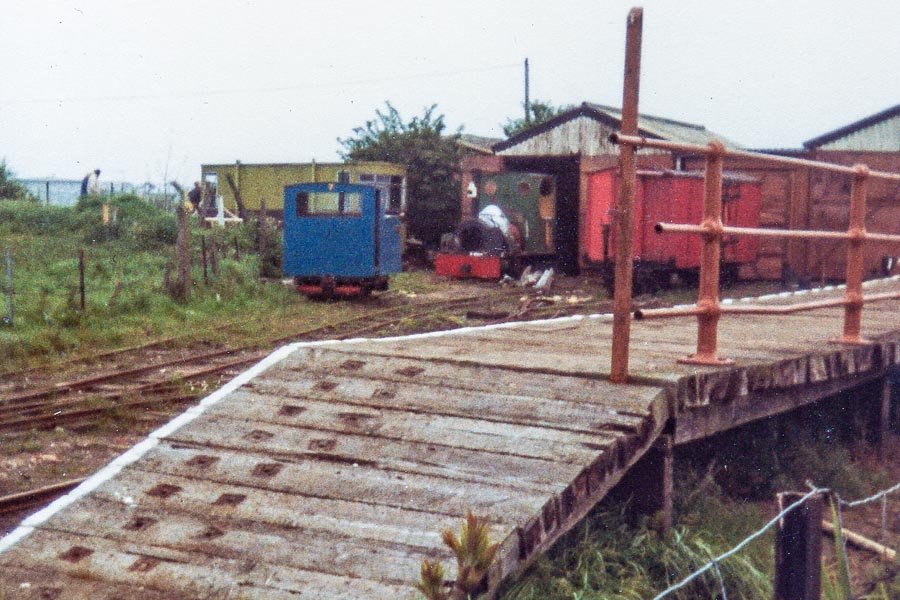
'Humberston' is a representation of the platform end of the original Lincolnshire Coast Light Railway terminus at North Sea Lane, Humberston as it might have appeared before the line closed there in 1985. The line had operated at Humberston from 1960, initially on a formation a short distance to the east, before moving lock, stock and barrel to a new formation to make way for an expanding camping and caravan park.


The line was slowly reborn at Winthorpe near Skegness during the 1990s and 2000s and has become a successful heritage operation, celebrating 60 years 2020, but sadly without any public operation.


Construction and conversion of the ex-Ashover coach from the Meridian Models kit has been described on this blog in The Humberston Amendments and Next Stop South Sea Lane, as has Wilton - 009 Simplex of Deception. 


This is not a fine-scale representation by any means, I have used commercial parts where possible to represent the prototype as closely as possible, including a Wills platform kit and model boat stanchions, as described in The Road to Humberston.


I had wavered slightly on the issue of the ex-GNR somersault signal but in the end felt that it was such a distinct feature of the prototype I had to include it. It also really balances the scene out visually.


I never saw the LCLR at Humberston. Last weekend I drove past the station site and you would never know that it was ever there, under the sprawl of the current caravan park. To find out more, I always commend a visit to the LCLR Pages on Dave Enefer's Website.

Colin

Friday, 30 October 2020

The Road to Humberston

Earlier in October I completed the paintwork on my 009 LCLR Simplex 'Wilton'. Citadel 'Lothern Blue for the main bodywork, which had 4 slightly-thinned coats; Vallejo red on the bufferbeams, and a slightly lightened black on the frames, all hand-painted. Humbrol matt acrylic aerosol varnish has done a reasonable job of hiding the brush marks.


Glazing was almost as tedious as I thought it might be, 20 thou sheet cut to size to fit the apertures and held in place with Johnson's Kleer. Just for an idea of scale, the cab front window is 4.5 x 15mm... Just visible in the cab is the driver, a Hornby figure with his raised right arm lowered to about the position of the handbrake wheel on a Simplex (don't tell anyone but I haven't modelled it!). Primed, given a black wash and then dry brushed with flesh colour and overall blue in appropriate places he is certainly minimalist. Once he was fixed in place the cab roof was secured in position.


I realise I have been a little remise and not mentioned anything about the LCLR diorama for the coach and 'Wilton'. Here is a glimpse at an early stage or development, the platform is a much modified Wills station halt kit, reduced in height and with alterations to the support structure.


The track was painted using Halfords matt brown sprayed at the rail sides, and Humbrol matt brown (a lighter shade) sprayed down on the sleepers. Ballast is Woodland Scenics fine grey mixed with ash and AK smoke grey pigment, secured in place using Johnson's Kleer. Ground cover is my usual PVA/polyfiller/brown paint mix with WS fine turf sprinkled on, and grass from hanging basket liner. This was manicured with nail scissors and hair clippers, the various effects added with hairspray and scatter and some Martin Welberg weed tufts to add extra colour and texture.

The platform was sprayed in grey primer and then painted using washes of dark grey and brown followed by dry-brushing to give differing wood shades. The white line was masked off and off-white dry brushed on, which looked far too straight so I added in a few points of disruption...


The wooden platform at the North Sea Lane terminus of the LCLR was backed with a stanchion/rail fence, no doubt recovered from elsewhere. It is seen to good effect in this picture on Dave Enefer's website: http://www.davesrailpics.bravehost.com/lclr/img337w.jpg 

As this would appear at the front of the diorama I had some reservations about building this as it might be a view blocker, but decided to rise to the challenge and obtained some 15mm 3-hole model boat stanchions from eBay. With the aid of a jig drilled in some scrap ply I soldered 0.7mm brass wire in as the cross bars. When setting the posts into the platform I drilled 0.9mm holes and then opened then out with a 1.9mm drill to sink the base down a little. The post at the end looks to have had a sign on it at some point but I'm not sure what it was.


The platform fence had a light coat of etch primer and was then painted in Humbrol red/brown, with some red and yellow mixed in in an attempt to lighten it a bit. A lighter shade was dry-brushed over this and Humbrol matt varnish sprayed over, maybe a little too heavily on purpose to get a bit of a ghosting effect. Once dry it was set in place, showing here how it isn't that much of a view block despite being at the front.


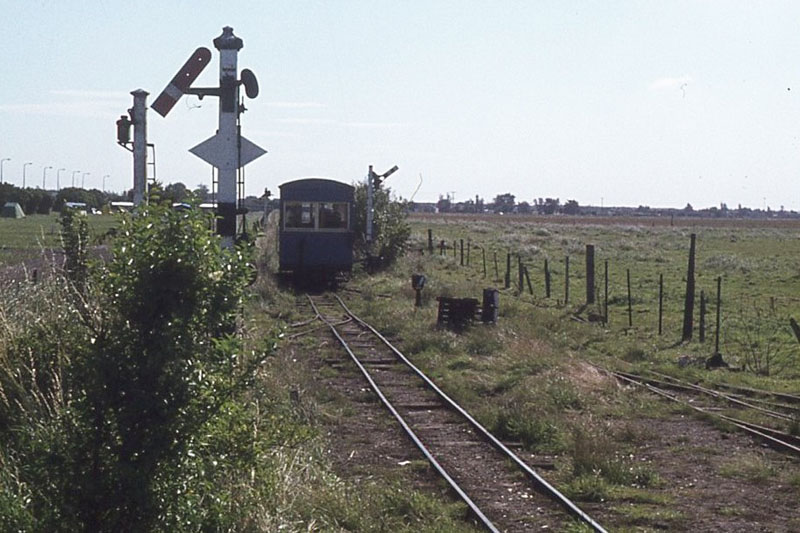
A distinctive feature of the LCLR North Sea Lane station was the ex-GNR somersault signal used as starter (although I get the feeling it was more ornamental!). Seen here in a rather overgrown state: http://www.davesrailpics.bravehost.com/lclr/img685w.jpg 

My attempt is scratchbuilt with the aid of a couple of etched parts supplied by my Dad. He also supplied the post, vintage Hornby Dublo, which (collectors look away now...) was cut down in height. Barring the ladder and wheel (both from old A1 etches) all other parts are scratchbuilt in styrene, with the bracket holding the arm being reinforced with wire to represent the operating rod.


The signal was painted, firstly with a waft of etch primer, followed once dry by a coat of white primer, and then some careful masking to apply the black and red with acrylics. Following a coat of matt varnish I applied some light weathering and posed it with the ladder in place. This is now ready to go in place on the diorama, update soon...

Colin


Sunday, 27 September 2020

'Wilton' - the 009 Simplex of deception

On return from holiday at the end of August  I decided to start a new project that has been in the planning for a while now. Having completed the ex-Ashover coach in LCLR condition and with a micro-diorama in mind, I needed a typical LCLR locomotive to stand with it. Having done some research into the various options I had settled on no.4 'Wilton' in it's Humberston condition. It still had the original bodywork when I visited the LCLR at Winthorpe in 2013 but has since been rebodied in a different style.


Having looked into various options on Shapeways for an 009 3D print Simplex chassis I eventually opted to scratchbuild the whole model, but incorporating the 3D printed buffer/couplings designed by David Malton that I had purchased some time ago. Building the model in this way allowed me to incorporate most of the bonnet into the chassis, giving the opportunity to add strength. Construction started in 30 thou styrene on the 30th August.


The cab was added from 30 thou styrene and 10 thou material overlaid on the bonnet sides to create the effect of the side sheeting overlapping the chassis frame. Surplus brass from A1 Models kit frets was used for the bonnet top and (presently removable) cab roof to gain strength in thin material. Details were built up using styrene rod for rivet heads, the exhaust and grease points on the axleboxes. The grille material on the front is from an ancient piece out of an MTK kit, inelegant but so is the prototype... The buffer/couplings were fixed in place and the plate around the bottom added from brass strip. 


Underneath the model there is a little bit of cheating going on. It is of course a dummy loco and rides on two Farish wheelsets. These are held in brass 'U' shapes drilled to hold the pin points, then attached to a length of styrene girder. Further bits of brass add strength either side. The axleboxes were fabricated from 20 thou styrene strip (20x80 and 20x20) and shaped once set to the distinctive Simplex shape.


Just as I thought the model would be ready for the paintshop, something was bugging me about it. I'd mostly worked from indistinct images, downloaded and printed on copier paper. I was not convinced that I had the boltheads on the frame in the right places (or enough of them) and looking at pictures of the loco as rebodied eventually confirmed this. Why I hadn't done this previously I've no idea... Going to add them I realised that the scrap of 20 thou styrene rod I had been using had been used up... This led to an order with 7mm Narrow Gauge Association Supplies being made on Sunday morning, arriving on Wednesday this week. 

I was then able to correct the bolt head detailing and then spray the model in primer.
 

I also realised that I had not added a cab door handle, and that perhaps the bonnet top needed a representation of hinges...


There are a few tidying jobs to do but I'm pretty happy with the result, hopefully it won't be long before the blue paint is required...

Colin
Wednesday, 6 June 2018

A Simplex in O9 - Details, Details

Aside from adding couplings the 3D print O9 Simplex is now complete, having been treated to a coat of matt varnish and some light weathering.


I've added a few bits and pieces to add character and more importantly, help to hide the Kato chassis. The oil can and pot are (probably) Duncan Models castings, these were already painted from previous projects, whilst the wooden tool box is one of the blocks from the Dapol Railbus underframe with lock and hinges added from styrene strip. Whilst the details have been secured with Araldite the driver has been placed using Tacky wax, he's a bit more vulnerable and there may be options for the loco in the future where he needs to be removed.


Designer David Malton reminded me that there were holes in the running plate for a handrail at the radiator end. Rather than fit a simple bent up-and-over rail I followed David's drawing in the Railway Modeller and added a cross bar, carefully soldering it together. Of course I then opened up Facebook to be confronted by a picture of a Simplex with a simple up and over bar handrail... either way, I'm very pleased with how this has turned out.


From the side the slight disparity between actual wheelbase and the axleboxes can be spotted, but this isn't usually visible from normal viewpoints.


Overall I'm pretty pleased with how this has turned out, it isn't a true miniature railway machine but as an accessible way to an O9 model it has worked out very well.

Colin

Monday, 28 May 2018

A Simplex for O9 - Paintshop Progress

The O9 Simplex has proceeded quickly through the paint shop, aided by the good weather and some useful moments of time. A final coat of plastic primer was followed by the main body colour of Halfords 'Meadow Green'. I masked off the bonnet openings, radiator and buffer blocks before spraying the main colour to avoid having to over-paint the glossy finish. The red and black-grey areas were brushed using Vallejo acrylics.


Various details were picked out such as the pipes, brake wheel and controls. The Kato chassis has been painted matt black where visible and dry-brushed with black-grey where visible through the frames to reduce it's visual impact. I managed to apply a coat of Dulcote and was lucky to have done so as the can promptly ran out straight afterwards!


 The driver has also been painted, his blue overalls hiding his trauma of his surgery.


Weathering is now under way to finish off the project.

Colin

Sunday, 20 May 2018

A Simplex for O9 - Driver on Duty

One of the fun things about building models that are not run-of-the-mill is that you are likely to find that there isn't a convenient driver figure to suit it. Therefore some creativity is required, and the O9 Simplex is no different.

Starting with a seated figure from a Preiser unpainted set (the man in a three piece suit from this set in painted form), I figured that his clothing could be altered with Miliput to resemble a boiler suit and that his arms and legs could be altered with some plastic surgery. The donor is a cheap Chinese copy useful for conversion parts. He's lost an arm and half a leg, the other arm of the seated figure being altered with one from my body bits box. The new foot on the pedal is a Preiser example, again from the bits box. 


Shortly after the picture was taken a hat swap took place... Whilst the original jaunty angled wide brim might have just looked OK in an estate railway context, I've gone for a workman style to cover any potential use of the loco. Again, this came from the donor figure, who now looks quite uncomfortable.

Having left the figure overnight to set I cracked open the Milliput and filled the gaps in the construction. Having sanded a few areas smooth I then added new collar detail using Typex to what used to be his waist jacket to give the effect of the overall's collar. I think once it is painted it will look OK, it is quite subtle and partly hidden by the light in this shot.

Whilst the Milliput was out I added a new knob to the controls where I had broken the original. I am now getting dangerously close to having to get back in the paintshop...

Colin

Thursday, 17 May 2018

A Simplex for O9 (Part 2)

Having established that my 3D printed Simplex could be mounted on a Kato chassis for O9 use, I carried out some work to make it a useable locomotive. To make the chassis a bit more secure I added lengths of 40 x 100 Evergreen strip to steady it, including two thickened up areas in opposite corners to take tiny screws to hold the chassis in place (Yes I'm aware the chassis looks a little on the wonk, it's on the snagging list!).


As can be seen at this stage I also removed the printed axleboxes and created my own further back towards the Kato chassis mounted on my support strips. This is a result of having studied some pictures of the RH&DR machine and noticing that it has the axleboxes set further in from the edge of the frames than 2ft machines.

Also visible in the shot above are the slots filed into the coupling castings to create a 6mm height to allow a MicroTrains coupler to be attached. The usual mounting height for these is 7mm but I have some designed for use on Trailer-on-Flatcar (TOFC) cars that are underslung and so have saved removing a lot of material.


Having the axleboxes set further in removes some of the slightly unbalanced look they had at the frame edges for a 9mm gauge machine and helps hide the overlong wheelbase of the chassis, even from the side view.


With work on the body pretty well complete, I started work on a driver figure created from a Prieser seated figure. I've also found some little bits and pieces to add to the running plate to help hide the motor unit under the radiator.

Colin

Monday, 14 May 2018

A Simplex for O9 (Part 1)

When David Malton (of Abbey Light Railway in O14 fame) released his 7mm scale Simplex print on Shapeways I was immediately tempted as I had achieved much better results than I had anticipated with my 009 Ruston print. I was keen to try something in 7mm scale, and O9 if at all possible.
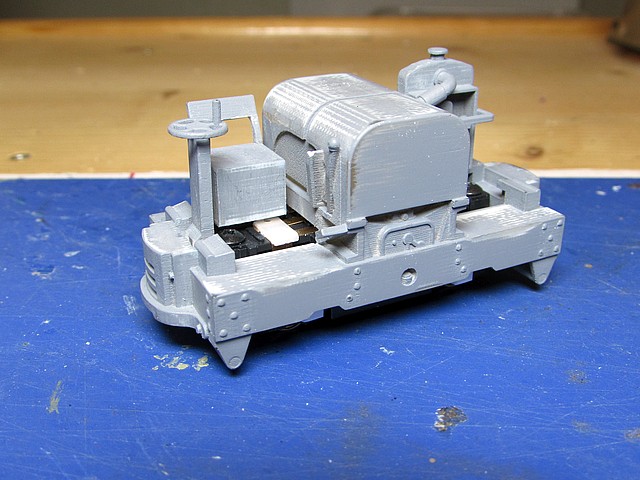
On receipt of the print I treated it to a day in a bath of white spirit followed by a good scrub with warm soapy water. I then applied a coat of Halfords plastic primer and when dry rubbed this down with 1200 and 1500 grit wet and dry to start to fill the print lines. Another wash down and once dry I re-primed and smoothed back again. That got us to this stage (and yes, I knocked a knob off a lever):


Realising that the next coat of primer would probably be smooth enough I opted to carry out my planned modifications before another coat was applied. I then started to investigate whether it was possible to mount the body onto a Kato drive unit to make a working O9 loco (the print is designed for a Locos n Stuff drive unit for O14 or O16.5). I accepted at this stage that the wheelbase would be too long - 28mm vs the print's 24mm, but reasoned that the wheels would be far enough in not to be too noticeable.

Having shortened a Kato chassis almost as short as it would go at either end and removed much surplus material and detail, I then found I had to remove two 45 degree sections from the underside of the body to clear the motor housing. The phrase I used to describe this was that it was rather like I imagine Kendal Mint Cake Mining to be...


This work brought the ride height to 12.5mm at the top of the frame, which matches David's recent drawing from the Railway Modeller pretty well. It also looks OK from most angles, but it is a good job that I don't have an eye level viewing layout or the deception would be all too obvious!

More as the project progresses...

Colin