Tuesday, 22 December 2020

Alan Keef K12 in O9 - Everythings Gone Green...

With a dry spell of weather over the weekend I managed to get a coat of varnish over the ever-so-slowly painted Alan Keef K12.


The green is Halfords 'Meadow Green', but you might have guessed that! Black and red areas were brush painted, red first over red oxide primer and then the green and red were masked off for the black to be painted.

Grilles are some old etched fencing panels cut to shape, blackened, painted and added in between painting and varnishing. The cab side panel has not come out too badly in the end, although this is somewhat helped by the very flat finish the Humbrol varnish creates.

There are a few jobs to complete such as glazing and I think it will definitely need some weathering to hide the ropier parts of the paintwork. It might have to wait though...


Colin

Wednesday, 16 December 2020

Christmas Tree Halt

I think most micro layout builders have thought at some point about building a seasonal scene, myself included. I thought about it again in November this year in light of having acquired what I thought was a thick cardboard 30cm cake board earlier in the year. However I reckoned that I might have left it a bit late at my rate of progress so decided not to. Roll on a week or so and challenged to create a Christmas decoration for a virtual Christmas meeting I simplified the plan down, and this is the result...


More of a decoration than a serious layout, on starting construction I discovered the board was more likely MDF than card when stripped of the foil covering. I added some strips of recycled 8mm ply underneath to strengthen it. The track is some (very) secondhand N gauge flex track with the rails curved using an improvised rail bender. This was surrounded by mount card, and covered with wood filler. The rest of the scenery is polystyrene and card covered with wood filler, then a layer of white paint/filler/PVA mix and the snow itself is largely paint. Two Noch fir trees form the centrepiece and are accompanied by some smaller, bare sea moss trees, recycled from my daughter' s winter diorama.


The sign and bench are scratchbuilt from timber scraps, treated with button polish (shellac) and lightly painted. The sign was printed on photo paper and fixed in place.


The loco is my modified Minitrains Bagnall 'Isla' and the brake van modified from a Dundas WHR kit. The wagonload of presents was constructed especially for the project and started life as a scratchbuilt O9 body that was surplus to requirements, it was narrowed down, extra floor plank ends marked on and placed on a Colin Ashby 009 chassis. It contains miniature presents made from balsa blocks wrapped in miniature wrapping paper downloaded online and printed! 


Although 009 at the moment, in theory an O9 version is possible if the right stock was available...

Colin

Saturday, 21 November 2020

Alan Keef K12 in O9 - 3D Print Manipulation

I haven't managed to get much modelling done over the last couple of weeks, but I have managed to tweak the 3D printed K12 a little to better reflect the prototype. 

Having removed the original axleboxes and smoothed away the remains I added 20 thou styrene behind the frames cut to the correct shape, and then 40 x 30 thou strip to build up the depth below the axlebox positions. The bottom of each buffer beam gained a 60 x 60 thou strip. Once set in place these items were shaped to suit and Milliput used to fill any gaps.

New axlebox and spring detail is formed using various sections of styrene strip, the springs being much thinned down rod. I did try to scribe a spring effect onto this before cutting but it remains to be seen whether this will actually show up.


The grilles caused some fun and games as I initially thought I had no suitable square pattern material in stock. In the past I have used old sections of A1 Models chain link fencing etch for this but had nothing the right size in the usual place. Thinking that I had some fresh pieces in my 4mm scale scenic stash I was stumped when I couldn't find them, it was only when locating the diamond pattern etch I'd used on my 1/24th Lister that eventually found the spare length of fence!

The coupler blocks that I created a few weeks ago by laminating together styrene sheet and strip have been located at a height to suit MicroTrains couplers. They are drilled to allow a 1015 coupler to be secured with a screw from underneath. Bolt head detail is from EDM Models


On the front end I have added slithers of Plastruct hex section to represent the bolts at the top of the bonnet front. 

At this stage rather a lot of paintwork had been rubbed back, and I did have a concern that in places the primer had not adhered to the rubbed-down factory finish. Several edges saw the paint chip away all to easily... After a good scrub down I applied a very light coat of primer as a proof coat and also in the hope that it dried better as a thin coat. After a few more adjustments another coat was added and the end result was this.
 

It's a bit rough in places but it will have to do, and hopefully painting and weathering will distract the eye a little. I've now given it a rub down with 1500 grit wet and dry in preparation for a sprayed coat of green, I've chickened out of Keef factory applied orange!


If you fancy an O9 K12 yourself, A1 Models have the print listed on eBay here...
 
Colin

Saturday, 7 November 2020

Alan Keef K12 in O9 - Take 2

"I have a bodyshell I have adapted from a commission job that may be of interest." So began an email discussion from John Flower at A1 Models, in a later reply he said "The body I am sending you was done for a customer in 7mm scale for him to fit a chassis. He isn't doing O9 but it would be used in these gauges." The resultant parcel that arrived a few days later was opened with a mixture of excitement and trepidation, as John had described how the vendor he is using for printing now offers the prints ready-sprayed in a semi-gloss finish.

There it was, instantly recognisable as an Alan Keef K12. Those with long memories may well remember that I scratchbuilt one of these nearly ten years ago, then regretfully exported it to the other side of the globe! 


I'll have to admit, that on first impressions the finish didn't really grab me, but after about 3/4 hour of smoothing using 400 then 800 grit wet and dry, I had flattened off most of the finish. Certainly different from finishing raw prints with cycles of filler primer and smoothing, but with hindsight I would perhaps rather have that level of control. It is worth noting that the print is actually in a black material, apparently this is unpopular with some customers, are they conditioned by what Shapeways churns out? Personally I cannot see anything wrong with it....

Getting adventurous I marked up and scribed in the lines denoting the upper edge of the frames and buffer beams, and the panel join towards the front of the bonnet using an olfa (style) cutter. I also created some extra clearance inside to allow the body to sit on a much modified Bachmann Plymouth chassis.


When I say much modified, I mean filed and cut to within a millimetre of it's life, and converted to 4w in the process.


Compared with the drawing in the Alan Keef book, reduced to 7mm scale, the print is about 5mm too long and 3mm too wide, understandable as it was intended for a 16.5mm gauge mechanism. The other main area where the print differs visually from the drawing is in the bottom edge of the frames and the axleboxes.


A coat of grey primer allowed me to better judge the finish I had achieved. Unfortunately the printed bolt heads on the cab side panel didn't look as happy as I had hoped they would and I will be looking to reduce these considerably before going much further.


I'm also looking into modifying the bottom edge of the frames, as I would really like to add the correct shape by adding small fillets at the bottom of the frame and also to add depth to the bufferbeams. This will also mean that I need to alter the axleboxes. As printed the front one is not the same distance from the front as the back one is from the back (and they should be the same), altering this will actually make it match the power unit and better reflect the drawing.


More when some progress is made...

Colin

Sunday, 1 November 2020

Humberston - 009 Micro Diorama

Regular readers of this blog will be familiar with my Micro Dioramas, 70mm deep scenes designed to fit on the shelves of a wall-mounted display unit. There's a bit of a history here: A Brief History of Microramas

'Humberston' is a representation of the platform end of the original Lincolnshire Coast Light Railway terminus at North Sea Lane, Humberston as it might have appeared before the line closed there in 1985. The line had operated at Humberston from 1960, initially on a formation a short distance to the east, before moving lock, stock and barrel to a new formation to make way for an expanding camping and caravan park.


The line was slowly reborn at Winthorpe near Skegness during the 1990s and 2000s and has become a successful heritage operation, celebrating 60 years 2020, but sadly without any public operation.


Construction and conversion of the ex-Ashover coach from the Meridian Models kit has been described on this blog in The Humberston Amendments and Next Stop South Sea Lane, as has Wilton - 009 Simplex of Deception


This is not a fine-scale representation by any means, I have used commercial parts where possible to represent the prototype as closely as possible, including a Wills platform kit and model boat stanchions, as described in The Road to Humberston.


I had wavered slightly on the issue of the ex-GNR somersault signal but in the end felt that it was such a distinct feature of the prototype I had to include it. It also really balances the scene out visually.


I never saw the LCLR at Humberston. Last weekend I drove past the station site and you would never know that it was ever there, under the sprawl of the current caravan park. To find out more, I always commend a visit to the LCLR Pages on Dave Enefer's Website.

Colin

Friday, 30 October 2020

The Road to Humberston

Earlier in October I completed the paintwork on my 009 LCLR Simplex 'Wilton'. Citadel 'Lothern Blue for the main bodywork, which had 4 slightly-thinned coats; Vallejo red on the bufferbeams, and a slightly lightened black on the frames, all hand-painted. Humbrol matt acrylic aerosol varnish has done a reasonable job of hiding the brush marks.


Glazing was almost as tedious as I thought it might be, 20 thou sheet cut to size to fit the apertures and held in place with Johnson's Kleer. Just for an idea of scale, the cab front window is 4.5 x 15mm... Just visible in the cab is the driver, a Hornby figure with his raised right arm lowered to about the position of the handbrake wheel on a Simplex (don't tell anyone but I haven't modelled it!). Primed, given a black wash and then dry brushed with flesh colour and overall blue in appropriate places he is certainly minimalist. Once he was fixed in place the cab roof was secured in position.


I realise I have been a little remise and not mentioned anything about the LCLR diorama for the coach and 'Wilton'. Here is a glimpse at an early stage or development, the platform is a much modified Wills station halt kit, reduced in height and with alterations to the support structure.


The track was painted using Halfords matt brown sprayed at the rail sides, and Humbrol matt brown (a lighter shade) sprayed down on the sleepers. Ballast is Woodland Scenics fine grey mixed with ash and AK smoke grey pigment, secured in place using Johnson's Kleer. Ground cover is my usual PVA/polyfiller/brown paint mix with WS fine turf sprinkled on, and grass from hanging basket liner. This was manicured with nail scissors and hair clippers, the various effects added with hairspray and scatter and some Martin Welberg weed tufts to add extra colour and texture.

The platform was sprayed in grey primer and then painted using washes of dark grey and brown followed by dry-brushing to give differing wood shades. The white line was masked off and off-white dry brushed on, which looked far too straight so I added in a few points of disruption...


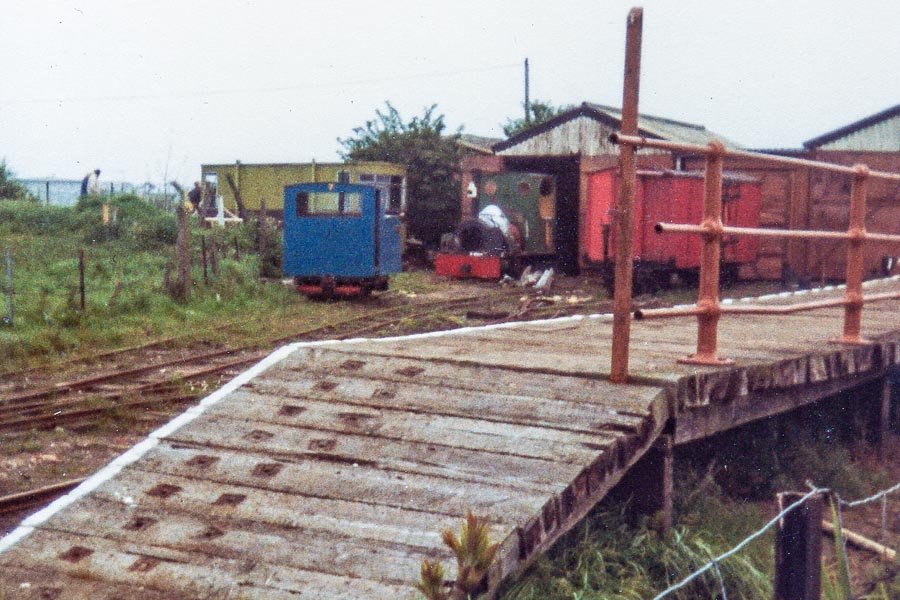
The wooden platform at the North Sea Lane terminus of the LCLR was backed with a stanchion/rail fence, no doubt recovered from elsewhere. It is seen to good effect in this picture on Dave Enefer's website: http://www.davesrailpics.bravehost.com/lclr/img337w.jpg 

As this would appear at the front of the diorama I had some reservations about building this as it might be a view blocker, but decided to rise to the challenge and obtained some 15mm 3-hole model boat stanchions from eBay. With the aid of a jig drilled in some scrap ply I soldered 0.7mm brass wire in as the cross bars. When setting the posts into the platform I drilled 0.9mm holes and then opened then out with a 1.9mm drill to sink the base down a little. The post at the end looks to have had a sign on it at some point but I'm not sure what it was.


The platform fence had a light coat of etch primer and was then painted in Humbrol red/brown, with some red and yellow mixed in in an attempt to lighten it a bit. A lighter shade was dry-brushed over this and Humbrol matt varnish sprayed over, maybe a little too heavily on purpose to get a bit of a ghosting effect. Once dry it was set in place, showing here how it isn't that much of a view block despite being at the front.


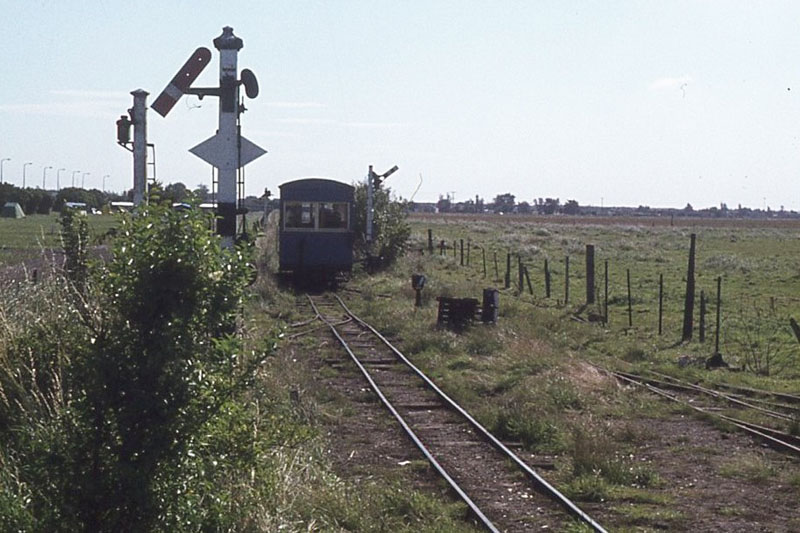
A distinctive feature of the LCLR North Sea Lane station was the ex-GNR somersault signal used as starter (although I get the feeling it was more ornamental!). Seen here in a rather overgrown state: http://www.davesrailpics.bravehost.com/lclr/img685w.jpg 

My attempt is scratchbuilt with the aid of a couple of etched parts supplied by my Dad. He also supplied the post, vintage Hornby Dublo, which (collectors look away now...) was cut down in height. Barring the ladder and wheel (both from old A1 etches) all other parts are scratchbuilt in styrene, with the bracket holding the arm being reinforced with wire to represent the operating rod.


The signal was painted, firstly with a waft of etch primer, followed once dry by a coat of white primer, and then some careful masking to apply the black and red with acrylics. Following a coat of matt varnish I applied some light weathering and posed it with the ladder in place. This is now ready to go in place on the diorama, update soon...

Colin


Sunday, 4 October 2020

A Tale of Hinge Envy

Earlier in the year, before the world of lockdown, my thoughts turned to rolling stock for a future O9 project. Whilst some existing wagons could be used, more would be required if I went down a light industrial or agricultural route. In my analysis, my usual way of wagon building had three points of time consumption:

  • Scribing plank lines on styrene sheet
  • Creating wood grain effects
  • Adding bolt detail individually

The chance purchase of a Slaters sheet of rivet details on 20 thou styrene sheet prompted some experimentation. Using this and Slaters planked sheet the wagon body on the left was built, eliminating all three points of contention... However, it looked more like a wagon built from shed timber than planks! So the Mk2 version on the right returned to scribed planks on the sides (but retaining the Slaters sheet on the floor). 

The rivet strips were cut slightly finer on the second attempt and the end result looked quite reasonable. On the ends Evergreen channel section added further relief for minimal effort. However, once painted 
I wasn't entirely happy with the result, and I eventually realised why when the Chivers Finelines O-16.5 wagons became available again... very little can match the finesse of Roger's tooling on the hinge straps etc. I realised I had hinge envy!


When ordering Evergreen rod for 'Wilton' last week I had a glance down the Grandt Line listing from 7mm NGA sales and found some 'Engine House Door Hinges' (ref 3524). A quick Google confirmed that they might fit the bill with a bit of adjustment so a pack was added to my order. A Mk3 wagon body was assembled, and I took the opportunity to put a new blade in my scriber for the first time in a while, which has improved the plank lines compared with the previous build.


As the photo shows, I've shortened the hinges, and then carefully recovered the top two bolt heads and fixed them in new positions. I've also added the redundant top sections at right-angles to create the point at which the sides will be secured in place. I opted for some simple extra hinge detail added from 10 thou styrene strip and some rod through the hole of the moulded hinge. Simple pieces of bent 0.5mm wire represent the locking devices for the doors, I had started making something much more complex but decided to keep it simple.


After a coat of primer I was impressed with how the hinges/straps looked. As and when wagon production is decided upon the Mk2 version will be upgraded to match, it is 0.5 mm narrower but that will add some variety, as will differing hinge details and end supports etc, with the aim that there are a group of similar, but not identical wagons.

Colin