Probably the last doodle for the wrapping paper box board for now, covering the last of the considered track arrangements. This time the evolution of my 'Upcycle' scheme from many years ago, but on a brand new board, not upcycled! Nothing too specific, a yard with assorted junk, a siding with an oil drum for fuelling locos and a nondescript hut...
Railway modelling in 7mm scale on 9mm gauge track, representing 15" gauge miniature railways and 18" gauge industrial railways. (Plus anything else that I choose to include!)
Thursday, 7 May 2026
'Up-cycle' Revisited?
Sunday, 5 April 2026
Easter Reflections
Six Easter's ago I started creation what should have been my next layout, an O9 version of the Julian Andrews brickworks plan, later known as 'Avalon Brickworks' in the stewardship of Howard Martin. We were in lockdown and the weekend saw rapid progress on the layout during the day and depletion of a small keg of Hobgoblin (Ruby) in the evenings, and maybe afternoons... All the details
- The curve at the top-right hand corner was never smooth enough and really needed completely relaying.
- The angle and curve in the middle siding could never be decided on (in many ways due to me persisting trying to use MicroTrains couplers) - now actually I think it looks right as first laid!
- The fiddle yard siding was later extended and curved and always seemed to get in the way.
- I should have raised the track bed up from the board surface as I did on 'Shifting Sands', it always looked too 'sunken' around the edges.
The inglenook variations on that board hold a little more possibility for this by using them as a desk-sitter, but the board length will only just fit across the desk and with a solid wall either side I foresee issues getting it into place reliably. The original 'Upcycle' scheme that was abandoned well before Easter 2020 was a little shorter in length and perhaps better for it, although it could have benefitted from a little more depth. Height-wise it was designed to fit into a space and was going to present a challenge with fairly low-key scenery up to hedge/fence height.
However, at the moment, the idea of a single board that is shorter than the 30" of the Scale Model Scenery board, desk-sits easily and has low height scenery to store away with ease, is quite appealing. If it could offer a continuous run and some shunting possibilities, have a fairly generic setting and use the stock built recently with Greenwich couplers, it might tick a lot of boxes. If it looks like what was laid six years ago, that will be entirely a coincidence...
Food for thought...
Colin
Thursday, 3 October 2019
Desk-Sitting - Again!
The track has been lifted some time and the board used for the recent tight curve research and Greenwich coupling tests. As rebuilt I have retained a very short extension piece, only 1 1/4" but that is enough to bring the usable length to 25". The extension is fixed in place and could either be boxed in within the backscene and fascia boards or just left hanging out! The extra length allows clearance for a 3-3-2 inglenook with loco+2 behind the first point or loco+4 behind the second.
Alternatively, there is a one point option with 4-4 in the sidings and loco+3 behind the point and perhaps a bit of allowance for an odd longer wagon.
I'm torn between the schemes, the first could be made to work as a shed scene but as a wagon-shuffling scene the sidings look short compared to the simpler plan. The alternative might be a boxfile project but the appeal of a single board is strong. Hmm...
Colin
Friday, 19 April 2019
The Beck Bridge - Supersize Me
And underneath:
The length of the diorama is 14 inches, the same as 'The Headshunt', as that has proved to be a workable size for photography and storage. All materials are recycled, the plywood used as the edging coming from an old wardrobe, I've hidden the veneer on the inside as it is the only downside to using the material as it splinters when cut. the other side, used outwards, cleans up very nicely for painting. With the existing diorama and bridge in place an impression of how it will develop can be gained.
The remains of the cat food box are a very tight fit, having foreseen this two pencil-sized holes have been provided to allow it to be pushed out!
In due course the cat food box will be glued in place, but not before the outer frame has been painted.
Colin
Sunday, 14 April 2019
The Beck Bridge - Tectonic Shift
Of course this doesn't resolve any of the original issues with the cat food box in terms of size and usability, so some further thinking was required. The obvious idea was to extend the scene and it soon became apparent that the best way to achieve this was to build a new, bigger, base and incorporate the existing scene into it. The depth of the box would need to be reduced and I was able to take advantage of the bottom fill being layers of corrugated card taped (rather than glued) together. Having measured carefully I cut through the outer box and separated it between two of the layers. To my amazement it didn't fall apart!
Colin
Saturday, 13 April 2019
The (Upcycle) Saga Continues...
The rescued timber has been cut into triangles to add strength to the corners of this new structure. I've even managed to incorporate some of the plywood that formed the board surface of the original 'Upcycle' so its pedigree is impeccable!
More soon...
Colin
Thursday, 20 October 2016
Rambling Thoughts of a Desk-Sitter
Of course we have been here before, most recently with 'Upcycle', which was a little longer at 29" long, which was one of the issues that actually made it difficult to use as it was too tight a fit on the desk (i.e. too much needed clearing out of the way!)
If a new project does come into being, the lessons of Upcycle will be taken on board, notably having a decent height of backscene and not having a kick-back siding making life difficult. One option is to take the "less is more" single point approach that worked well on another desk-sitting project, my Gn15 'Ambassador Works', seen here in full form... on a desk...
Whilst delving through photos of past projects, it is worth pointing out that the balsa framed, foamcore topped baseboard being considered for this project is the much altered remains of the 'Misterton Fen Tramway' board from a few years ago. Subsequently used as a test track it was ironically replaced by 'Upcycle' and it's descendants. I have recently extended it at the right-hand end and for this project the left-hand end would also be extended.
We shall see...
Colin
Friday, 22 July 2016
It just came to pieces in my hands...
Saturday, 4 June 2016
What a load of rubbish!
There's a fair bit of history here. The cab contains parts from numerous half-started projects, the wooden planking is rejected parts from one of my O-16.5 wagon builds; the lattice girders were once intended as a water tower base for 'Shifting Sands'; the door is a left-over from carriage building at the time the Avalon Line masters were made; the wheels are the left-overs from my Del-Prado based Bassett-Lowke Class 30 project and the saddle tank from Badger. The litter bin is a resin casting I acquired some time ago, painted up with a forthcoming project in mind.
The bits box also contained what was due to be part of the kitchen equipment for the kiosk on 'Shifting Sands'. I decided to challenge myself to make it a workbench with a few items of equipment on it, all from the bits boxes. This is the result...
Apart from a piece of 1/16th" brass tube, the drill press is made entirely from re-purposed Dapol Railbus kit underframe parts, as is the tool box, and the majority of the vice (some Knightwing loco kit parts ended up in there too). The file and piece in the vice are Duncan Models castings. It will need a little more junk adding in due course once it has a home to go to. I may now have a go at making some more workshop equipment from the bits boxes, watch this space...
You may think that all this points to a workshop diorama being planned, and you might be right. However, what emerges in due course may be another scene completely involving that litter bin, we shall see. I have been working on a potential diorama base using something that may look rather familiar.
I'm just having to resist making it into a micro layout....
Colin
Monday, 18 January 2016
The Path To... (Part 2)
With the glue dry I carefully dry-brushed the tufts with a light grey/green mix of acrylic paint to reduce the sheen, and applied matt varnish to the laser cut plants to tone them down a little.
As you may have already guessed, the idea is to show that this is the path to the beach and hint at a seaside location. Perhaps the path to... Shifting Sands?
I do plan to add some signs warning of the crossing, but until then it has gone into the display cabinet. My usual light-wood surround and lettering completes the scene - or does it? As an experiment I have added a small backscene in the display cabinet to add to the illusion of depth. The beach hut scene is my own photo taken at Chapel St Leonards, given a watercolour filter in 'Photoshop' and printed on canvas photo paper.
Whether it is an experiment to be repeated, we shall see, I'm always looking at how items can be displayed and there are pros and cons to the micro-diorama approach, not least that it shows up that the cabinet shelves are not totally flat!
Colin
Monday, 4 January 2016
The Path To... (Part 1)
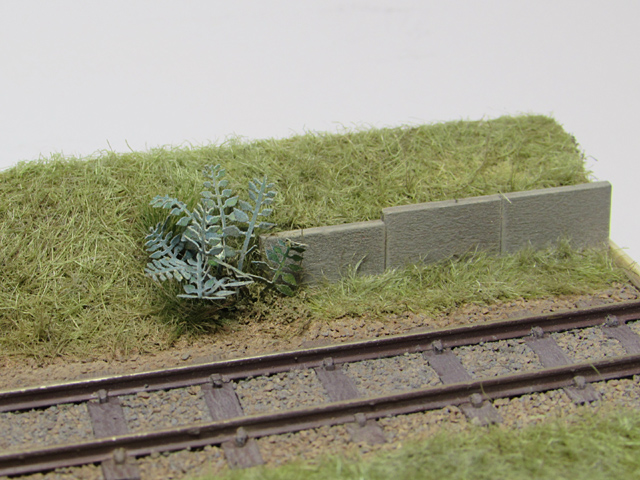
Both the steps and path had some adjustments to both texture and colour, with a little weathering added. More colour variation will be built up in due course using weathering powders. At the far end some of my pre-made paving slabs form a short section of retaining wall. The ground areas have been covered with what is described as 'Shifting Sands earth mix' - Woodland Scenics fine earth and fine sand for the coastal sandy look.
Colin
Friday, 1 January 2016
Twenty16
A new year and one destined to be full of change. Life is set to change again in a way that will put even more pressure on time and space in the Peake family 'cottage' for the foreseeable future. I think that this time it may be the catalyst for major changes in the way hobby time is conducted (if indeed much remains in the future) and the nature of what is produced. I've hinted at this previously with my 'nagging doubts' about the railway cupboard workbench (see 'Ten') but it seems to be the time to seriously consider the options, not least as I feel that the square footage occupied by the bench and legroom underneath may be required domestically.
So where could the workbench wander? Whilst the dark, wet evenings of the past week are enough to put anyone off wanting to move lock, stock and barrel to the workshop, it is an option, despite being uninsulated and rather anti-social! To be honest, I have grabbed a few moments in there of late for an ongoing diorama project, as seen here (more another time):
Also under consideration is some sort of portable workbench, maybe a return of the “kitchen table workshop”. I'm working through the potential issues so hopefully something will be feasible. As for what is produced, we shall see, the more eagle eyed will have spotted some excessive wagon tinkering again, including a potential diversion to O-16.5....
Colin
Sunday, 25 October 2015
Confessions of a rubber gauger
Friday, 9 October 2015
Up-cycle - The saga continues?
Saturday, 9 May 2015
Watching 'The Headshunt' / A1 Models Hunslet Update
Friday, 1 May 2015
Completing 'The Headshunt'
As the scene represents the end of a station area I have included appropriate signage on the barrier at the end of the platform. This is from an old Lithoplan 4mm scale set of signs but seems large enough in 7mm scale!
Another small detail that was required was a linkage between the RC Link point lever and the point, this is a piece of brass strip bent to shape with a Grandt Line bolt at one end.
As hinted at last time, I have tweaked the ballast in places to build up the levels, and also added some more Silfor grass tufts along the edges of the ballast at the far end, adding some more detail but really just to hide some awkward patches in the ballast cover!
I have tidied up around the edges of the scene, using a black surround, a contrast to recent efforts in natural wood, I have used matt black paint. In typical fashion I have added the diorama name in dry-print lettering to the front edge and protected it with matt varnish.
There are a few extra items to add in due course, not least a removable figure to stand by watching proceedings, however the diorama is now largely complete.
Colin