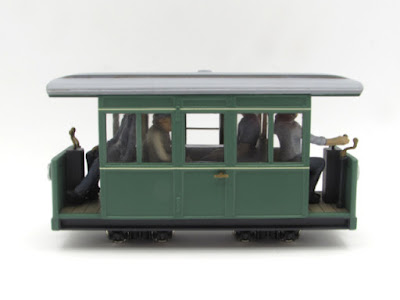
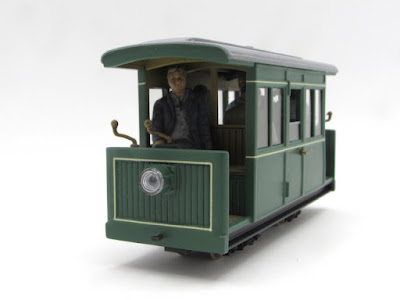
The O9 tramcar was varnished in a spare moment on Christmas Eve, using Halfords matt lacquer as an alternative to Dulcote or a Humbrol aerosol. This is the first time I have used this product and the verdict is that I am pretty impressed with it, having just a little sheen that is not inappropriate for coaching stock or locomotives.
With the paintwork completed and festivities out of the way I moved on to a list of tasks to further completion:
- Fitting the controllers and brake handles in place on each balcony
- Fitting 7mm NGA door handles on the centre doors
- Flush glazing the side windows using 20 thou styrene fixed in place with Kleer. The door drop-frames have a band of chrome trim along the top using a sliver of car body trim strip
- Weight (self-adhesive window lead) added in pockets between the body sides and seat supports
- Figures fixed in place in the centre compartment and balconies
There was some hesitancy over a suitable driver figure (or figures...) Five candidates were prepared for this task! Left to right, they are:
- Chinese Preiser copy in a slightly soapy plastic. Used in initial testing of the seating and generally good, but not 'hands on' enough for my liking as the main driver.
- Monty's Models industrial diesel driver, posed with this hand on the controls. Whitemetal, so to balance him out...
- S&D Models young man, relaxed pose for the back platform.
I then started to worry about the whitemetal figures adding weight in the wrong places, high centre of gravity etc on the Kato bogie chassis so looked for a plastic option again, leading to... - Chinese Preiser copy (old man with stick) in hard plastic, modified to seated position with hand on the controls and head-swapped. Enthused I also created...
- Chinese Preiser copy (young lady hand in hair), modified to seated position with her other hand on the controls.


No comments:
Post a Comment