Monday 28 May 2018

A Simplex for O9 - Paintshop Progress

The O9 Simplex has proceeded quickly through the paint shop, aided by the good weather and some useful moments of time. A final coat of plastic primer was followed by the main body colour of Halfords 'Meadow Green'. I masked off the bonnet openings, radiator and buffer blocks before spraying the main colour to avoid having to over-paint the glossy finish. The red and black-grey areas were brushed using Vallejo acrylics.


Various details were picked out such as the pipes, brake wheel and controls. The Kato chassis has been painted matt black where visible and dry-brushed with black-grey where visible through the frames to reduce it's visual impact. I managed to apply a coat of Dulcote and was lucky to have done so as the can promptly ran out straight afterwards!


 The driver has also been painted, his blue overalls hiding his trauma of his surgery.


Weathering is now under way to finish off the project.

Colin

Sunday 20 May 2018

A Simplex for O9 - Driver on Duty

One of the fun things about building models that are not run-of-the-mill is that you are likely to find that there isn't a convenient driver figure to suit it. Therefore some creativity is required, and the O9 Simplex is no different.

Starting with a seated figure from a Preiser unpainted set (the man in a three piece suit from this set in painted form), I figured that his clothing could be altered with Miliput to resemble a boiler suit and that his arms and legs could be altered with some plastic surgery. The donor is a cheap Chinese copy useful for conversion parts. He's lost an arm and half a leg, the other arm of the seated figure being altered with one from my body bits box. The new foot on the pedal is a Preiser example, again from the bits box. 


Shortly after the picture was taken a hat swap took place... Whilst the original jaunty angled wide brim might have just looked OK in an estate railway context, I've gone for a workman style to cover any potential use of the loco. Again, this came from the donor figure, who now looks quite uncomfortable.

Having left the figure overnight to set I cracked open the Milliput and filled the gaps in the construction. Having sanded a few areas smooth I then added new collar detail using Typex to what used to be his waist jacket to give the effect of the overall's collar. I think once it is painted it will look OK, it is quite subtle and partly hidden by the light in this shot.

Whilst the Milliput was out I added a new knob to the controls where I had broken the original. I am now getting dangerously close to having to get back in the paintshop...

Colin

Thursday 17 May 2018

A Simplex for O9 (Part 2)

Having established that my 3D printed Simplex could be mounted on a Kato chassis for O9 use, I carried out some work to make it a useable locomotive. To make the chassis a bit more secure I added lengths of 40 x 100 Evergreen strip to steady it, including two thickened up areas in opposite corners to take tiny screws to hold the chassis in place (Yes I'm aware the chassis looks a little on the wonk, it's on the snagging list!).


As can be seen at this stage I also removed the printed axleboxes and created my own further back towards the Kato chassis mounted on my support strips. This is a result of having studied some pictures of the RH&DR machine and noticing that it has the axleboxes set further in from the edge of the frames than 2ft machines.

Also visible in the shot above are the slots filed into the coupling castings to create a 6mm height to allow a MicroTrains coupler to be attached. The usual mounting height for these is 7mm but I have some designed for use on Trailer-on-Flatcar (TOFC) cars that are underslung and so have saved removing a lot of material.


Having the axleboxes set further in removes some of the slightly unbalanced look they had at the frame edges for a 9mm gauge machine and helps hide the overlong wheelbase of the chassis, even from the side view.


With work on the body pretty well complete, I started work on a driver figure created from a Prieser seated figure. I've also found some little bits and pieces to add to the running plate to help hide the motor unit under the radiator.

Colin

Monday 14 May 2018

A Simplex for O9 (Part 1)

When David Malton (of Abbey Light Railway in O14 fame) released his 7mm scale Simplex print on Shapeways I was immediately tempted as I had achieved much better results than I had anticipated with my 009 Ruston print. I was keen to try something in 7mm scale, and O9 if at all possible.

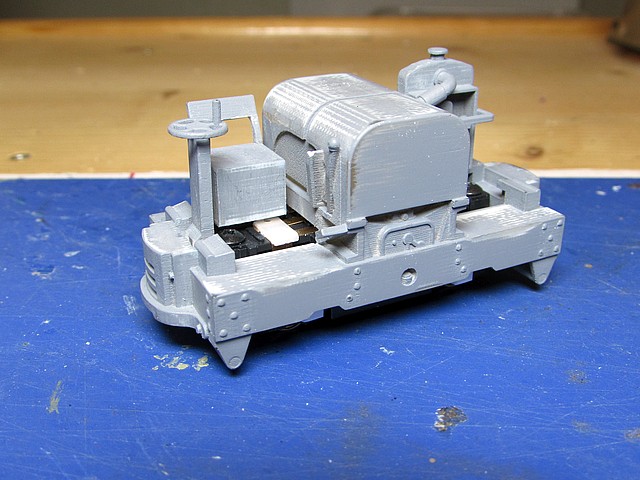
On receipt of the print I treated it to a day in a bath of white spirit followed by a good scrub with warm soapy water. I then applied a coat of Halfords plastic primer and when dry rubbed this down with 1200 and 1500 grit wet and dry to start to fill the print lines. Another wash down and once dry I re-primed and smoothed back again. That got us to this stage (and yes, I knocked a knob off a lever):


Realising that the next coat of primer would probably be smooth enough I opted to carry out my planned modifications before another coat was applied. I then started to investigate whether it was possible to mount the body onto a Kato drive unit to make a working O9 loco (the print is designed for a Locos n Stuff drive unit for O14 or O16.5). I accepted at this stage that the wheelbase would be too long - 28mm vs the print's 24mm, but reasoned that the wheels would be far enough in not to be too noticeable.

Having shortened a Kato chassis almost as short as it would go at either end and removed much surplus material and detail, I then found I had to remove two 45 degree sections from the underside of the body to clear the motor housing. The phrase I used to describe this was that it was rather like I imagine Kendal Mint Cake Mining to be...


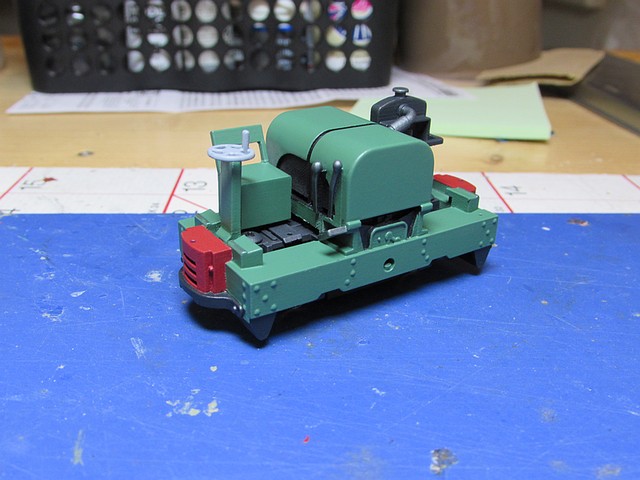
This work brought the ride height to 12.5mm at the top of the frame, which matches David's recent drawing from the Railway Modeller pretty well. It also looks OK from most angles, but it is a good job that I don't have an eye level viewing layout or the deception would be all too obvious!

More as the project progresses...

Colin