I spend a few idle moments a week watching videos on YouTube, as I suspect many of us do. Railway modelling is only one of several topics I follow but I have noticed that there is an increasing number of commentators talking about the cost of new products. Yes, railway Modelling can be an expensive hobby, if you want it to be...
I'm time, space and cash limited, buying new RTR products is not on the agenda, notwithstanding the fact I mostly model in a scale where RTR does not exist, the temptations of a Quarry Hunslet in 009 or NG7/O-16.5 have (so far) been avoided. Even many of the newer, closer to home temptations of quality 3D printed O9 models have not yet drawn me in. I actually find at the moment I'm happier in the workshop with recycled card and polystyrene, PVA and DAS modelling clay creating the foundations for a miniature world.

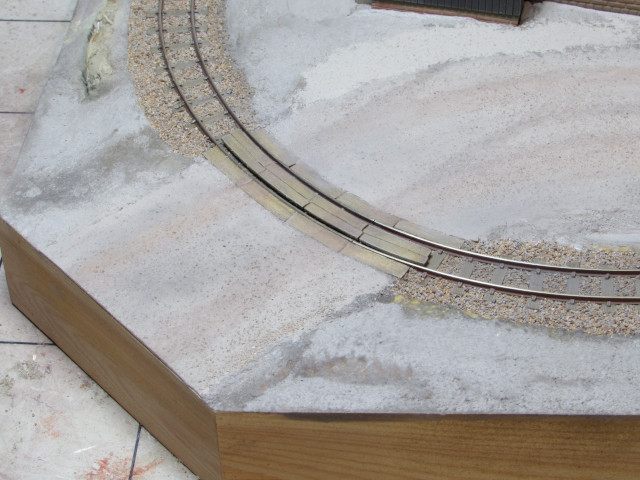
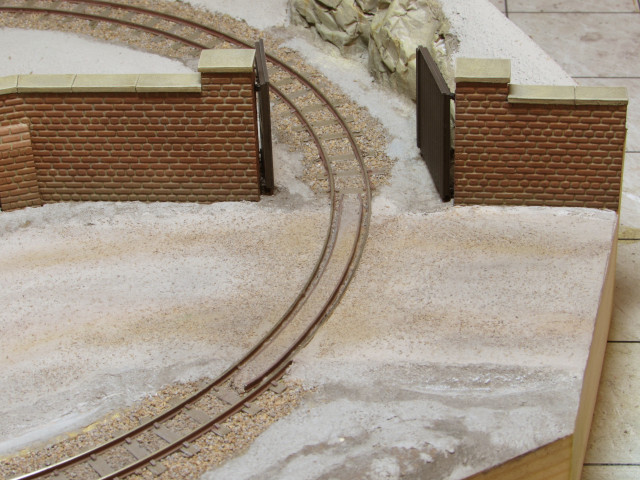
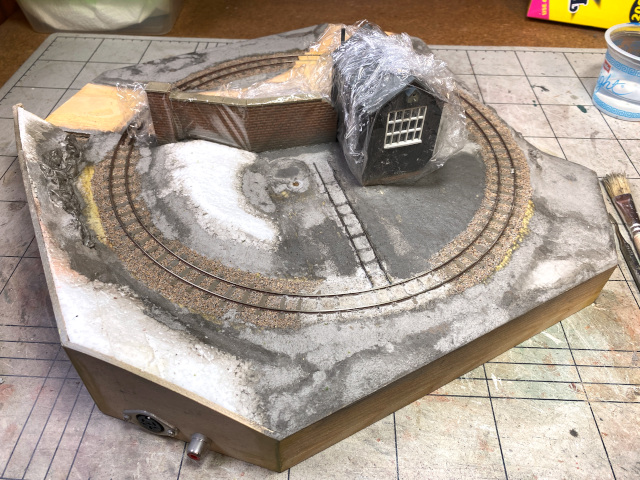
I realise that I am out of step with most of the (railway) modelling world by appearing to spend so much time on my groundwork, but in reality there aren't that many hours in what you see here, just spread out over many weeks! For instance this last week more clay work was the initial focus of work, with Isla assisting around the side and back of the office building. This included the last vast expanse of exposed corrugated cardboard, in reality a double-corrugated sheet with the top layer carefully peeled off when I realised it was too thick, leaving a rather weak exposed inner layer. Getting it all covered up will make life a lot easier in the long run.
In between the clay sessions with Isla I had added clay to the two outer areas to blend in the different levels and hide the joins with the outer timber strips. My attention then turned to how to initially cover the polystyrene areas ad in particular it's join along the timber strips. I really didn't want to use tiny bits or mod-roc and the mess that brings. The quick and easy alternative was to recycle the brown paper that you sometimes find in Amazon packaging, torn into strips and applied in two layers with lashings of PVA (hence the sheen catching the light). Again I had some assistance with this task... On the edges of the board the strips were laid oversize and cut back once the glue had dried.
The eagle-eyed may spot that during the clay work I filled in the extra holes that I had made whilst finding the optimum position for the tree, allowing for accurate location in due course. The basic foundation of my groundwork is now complete and attention can turn to the next stages, which will be colouring in the rock formations and surfacing the roadway, before moving on to the next stages of surface coating. Whilst good quality scenic material does have a cost, by working on a small project I don't need the vast quantities that some of the YouTubers must require, and I have enough in hand not to need to buy anything at this stage...
Colin