These three wagons are now making progress in the paint shop alongside the coach. It is a while since I've actually painted anything so I am taking it steady to get the best finish. I've also been making up a batch of Greenwich couplers for this micro-fleet which has actually been a lot easier than expected thanks to the new bending/assembly jig available from Light Railway Stores.
Railway modelling in 7mm scale on 9mm gauge track, representing 15" gauge miniature railways and 18" gauge industrial railways. (Plus anything else that I choose to include!)
Sunday, 14 December 2025
Odsock's Odd Wagons
These three wagons are now making progress in the paint shop alongside the coach. It is a while since I've actually painted anything so I am taking it steady to get the best finish. I've also been making up a batch of Greenwich couplers for this micro-fleet which has actually been a lot easier than expected thanks to the new bending/assembly jig available from Light Railway Stores.
Sunday, 7 December 2025
Junkbox Jury - Primed
I have been rather remise in not keeping you up to date with the progress of various models, but progress has been rather slow as priorities change and new whims took charge. The dismantled diesel has at least had a coat of primer, which as ever brings together the various materials to an even finish. As there will no doubt be red on the bufferbeams somewhere, and possibly the need for red primer to appear underneath where the coupler would be, I also masked off and sprayed red oxide primer onto those areas.
Sunday, 23 November 2025
Further Echoes
About a month ago I posted some mock-ups based on concepts for my 23.5" x 15.5" cork board baseboard. I was rather pleased that I could cram in a two-coach length loop in the space and felt that this could be the path to an interesting project.
Further thoughts about practicality (bah!) have now made this version of the scheme less likely. These are partially borne from the desire to have something that can be operated from the front at home, using slide-switch control of the points. The issue is the point on the right, I've sketched in the switch in red and it is close to the edge of the board. So close in fact that having any scenery to hide a notional 'hole in the sky' from the front view is almost impossible...
Wednesday, 12 November 2025
Junkbox Jury - a Tale of Two Coaches
The second vehicle is much better proportioned when sat with the Simplex so detailing continued to bring it closer to the paintshop stage. On the bufferbeams I added slithers of 25 thou styrene rod to represent bolt heads in line with the solebars and above the coupling area. Further bolt heads were added on the solebars above the axle box locations, but you cannot quite see them in the picture!
Friday, 31 October 2025
Junkbox Jury - Dismantled Diesel
The next excursion into the junk box revealed several disparate scratch built locomotive components, namely a collection of parts to make up a chassis frame to fit a Kato mechanism; A1 Models bonnets from a couple of incomplete builds and a set of parts to build a long bonnet using a cut-down Dapol railbus roof as the top. In the same vein as the wagon chassis in the previous post, I decided to create a locomotive that is not currently in operational condition.
That might be an understatement... as it appears to be missing a cab, gearbox, wheelsets and who knows what is/isn't under the bonnet!
This actually became a quite enjoyable project, adding details such as the recessed filler cap and the side grilles, which are in a trademark style common with a lot of locos that I have built over the years, as featured in Some I Made earlier.
Tuesday, 28 October 2025
Junkbox Jury - Wagon Bashing
A few weeks ago I hinted that some wagon tinkering could be on the cards in the wake of my experimentation with Greenwich couplers. In passing I mentioned that there were a couple of experimental wagons started some time ago, so they were brought out of storage to see what could be done with them. You could call it a dive into the junk box...
The first was a short (5ft) wagon, currently a flat but only because it got no further! The chassis under this is a Peco 15ft unit cut-down to a 14mm wheelbase, previously under a modified RCL skip frame. It was a little unloved and has now gained fake 'Hudson' style axleboxes assembled from styrene sections.
Saturday, 25 October 2025
Echoes of Shifting Sands
I had been thinking recently about 'half-station' layouts, where you see one end of the platform and the head shunt, maybe a siding, but the rest is off under a bridge or overall roof and trains are represented by only some of their length. They are perhaps not really my cup of tea but potentially offered a way of running the 'Shifting Sands' stock in a smaller space. As the idea grew in my head I mocked up this 3/4-station idea (with just the station throat off scene) that essentially gives a mini version of 'Shifting Sands'. It was late in the evening so the area was marked up on my desk!
Saturday, 18 October 2025
Pop the Cork(board) - a 20th Anniversary
This photo popped up in my OneDrive "Memories" this week, from 14th October 2005. The creation of 'Shifting Sands' was underway with the cork board strengthened underneath and the turnouts and oddments of track loosely laid out in the original planned formation.
Sunday, 21 September 2025
Alternative Coupling Analysis
Regular readers of the blog will be familiar with my use of MicroTrains couplers on my O9 locomotives and rolling stock and how this choice was decided upon more than 20 years ago when I wanted to have a single bogie/coupler arrangement for miniature railway outline carriages. I have often wondered how I might cope with an alternative, with the Greenwich couplers I have used on some of my 009 stock in mind. There are even some half-started experiments tucked away somewhere...
Looking around for something to occupy me over the last week, I started another experiment, this time using a familiar wagon in the shape of a Black Dog Mining style open wagon. Previously fitted with MicroTrains couplers I filled in the 5 x 2.5mm openings in the buffer beams with Evergreen styrene and made good the joins. Opting to fit the Greenwich couplers at the standard 009 height a small recess was removed to accommodate the 5.5mm mounting height. A tiny screw from a batch I bought on eBay holds the coupler in place.
Saturday, 30 August 2025
Someone Somewhere (In Summertime)
No apologies for borrowing Simple Mind's song title, I heard it on the radio for the first time in a while on Bank Holiday Monday whilst proving to myself that painting models was preferrable to painting rooms (especially woodwork...). With the end of August now upon us it does perhaps feel that the summer is reaching the end.
Alas there is no modelling progress to report and not a great deal of railway activity to report on at all, our holiday destination of Flamborough being a narrow gauge/miniature railway desert (we "did" Scarborough last year). There is the amusement of the model village at Sewerby and land trains that operate in a railway-like fashion with platforms, passing and turning loops, from there to Bridlington.
Sitting looking out to sea I could quite imagine something Groudle-Glen style around the headland from the lighthouse to Thornwick Bay...
Monday, 18 August 2025
A Black Cat Crossed My Path...
Sadly after 18 years Mr Sooty has now crossed the rainbow bridge. Often found lurking on the bed or windowsill whilst I was working or modelling and he would even give the workshop an inspection from time to time. In December 2008 he was keen to observe the test runs of the Knightwing-based diesel...
Saturday, 28 June 2025
'Avalon' - Finishing Touches
The position of these loops was set in such a way that a MicroTrains coupler can be manually coupled, seen here with my tool wagon. Whilst automatic uncoupling is not possible, for use on a layout such as 'Odsock Corner' that is not going to be an issue!
Wednesday, 25 June 2025
'Avalon' - a midweek extra
A quick look underneath reveals that I actually primed the chassis frame despite it being invisible in any normal circumstances. It somehow felt more complete that way...
 |
Saturday, 21 June 2025
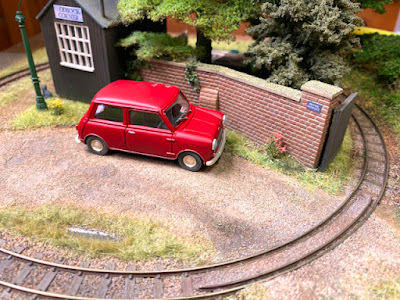
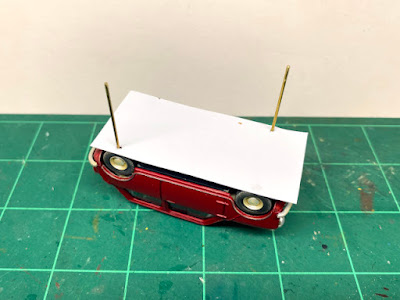
Parking up the Mini
Saturday, 14 June 2025
Avalon Loco Progress
Work is progressing well on the reworking of the pre-built Avalon Line loco. Although I want to keep as much of the original paint finish as possible, I felt that the all-encompassing grey finish needed something to both break it up and add some colour. The obvious and realistic thing to add was an area of red to the buffer beams and/or the coupler blocks. In the end the latter were carefully masked off, only to find that I had no red oxide primer to hand...


